Bikin FinGet started
Getting started with Bikin Fin
Sign up or sign in to Bikin Fin, fill in your company details, currency and opening balances, then finish the Quick start list.
This page takes you from sign-up to your first transaction. Most steps only need doing once, by the owner or the finance manager.
Create a new account
- Go to fin.bikin.studio and choose Create one free.
- Fill in Your name, Company name, Type of business, Email and Password (at least 8 characters).
- Enter the 6-digit code sent to your email.
Type of business sets the ready-made chart of accounts for your first company. The choices are grouped into Services (services, digital startup & SaaS, clinic & health, education, transport & logistics), Trade & production (trading, online store, F&B, manufacturing, farming) and Projects, property & stays (contractor, property & boarding houses, hotels & villas), with Other / general at the bottom. Account names follow your sector, for example Pendapatan sewa (rent income) for property, Pendapatan jasa medis (medical services income) for clinics, and raw materials, work in progress and finished goods inventory for manufacturing. You can still add and rename accounts later.
You can also choose Sign up with Google. Because Google has already verified your email, you only fill in your name, company name and type of business on the One more step screen.
If there is no sign-up button, sign-up is closed for now. Contact BIKIN at contact@bikin.studio to get an account.
The person who signs up becomes the account's Owner. New accounts start on the free plan.
Sign in
- Enter your email and password, then choose Sign in.
- Enter the code from your email. The code works for 10 minutes.
Signing in with your password is always followed by an email code. After that you stay signed in on that device for 30 days. Choose Sign in with Google if your Google account uses the same email, or link a different Google account in Settings › Account.
Forgot your password? Choose Forgot password? on the sign-in page, then follow the code from your email.
Sign in with WhatsApp
When the sign-in page shows Sign in with WhatsApp, you can sign in with a code sent by WhatsApp, without a password:
- Add and verify your WhatsApp number once in Settings › Account › WhatsApp number (see below).
- On the sign-in page, choose Sign in with WhatsApp and enter that number.
- Enter the 6-digit code from WhatsApp. The code works for 10 minutes. The Copy code button in the WhatsApp message copies it for you.
A WhatsApp code sent to your verified number replaces the password and the email code, so you're signed in straight away and stay signed in on that device for 30 days. Numbers that aren't verified never get a code.
Adding your WhatsApp number
- Open Settings › Account, the WhatsApp number card.
- Enter your number (for example 0812 3456 7890), then choose Send code. Because this changes how you sign in, Bikin Fin asks for an email code first.
- Enter the 6-digit code that arrives by WhatsApp. The number is saved as Verified.
Choose Change to use another number, or Remove to stop signing in with WhatsApp. One number can only belong to one person in Bikin Fin. The card doesn't show when WhatsApp isn't available for Bikin Fin yet.
If you were invited
The owner or a manager can invite you from Users & roles. You get an email with a temporary password. Sign in with that email and the temporary password, enter the code, then change your password in Settings › Account, in the Password card.
Welcome and Quick start
The first time you sign in, Bikin Fin shows a few welcome cards for your role. Owners and finance managers also get a Quick start card at the foot of the sidebar, right above the Bisik AI button (on phones, in the sidebar drawer). The card shows your progress in percent and the next step.
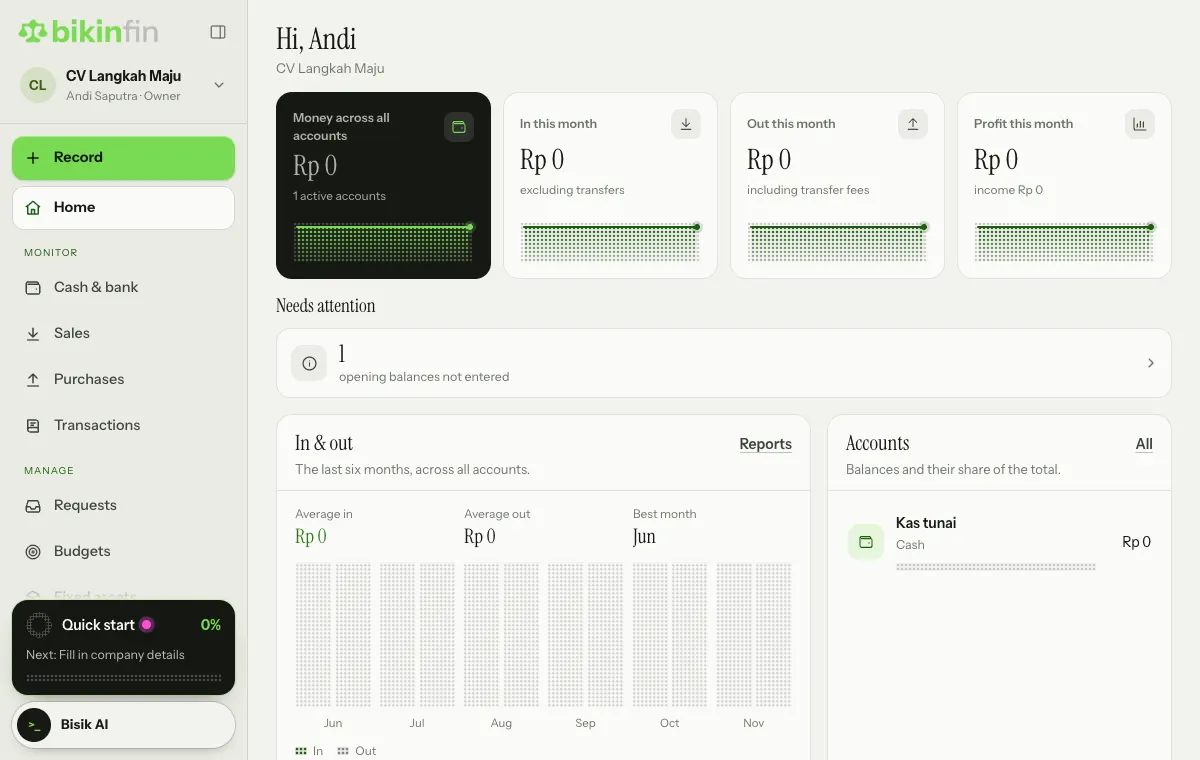
Tap the card to open the list of six steps. Each step ticks itself once the data is there:
- Fill in company details: tax number, address and VAT status appear on invoices and tax reports.
- Add a bank account: without one, money in and out can only go to Cash.
- Enter opening balances: bank, receivable, payable and capital balances on the start date. A brand-new company can skip it.
- Add customers and vendors: transactions with a contact can be summed up per customer or vendor.
- Record your first transaction with the Record button: Home, account balances and running profit fill in from transactions.
- Invite your finance team: staff record, managers void and organise, accountants read and export.
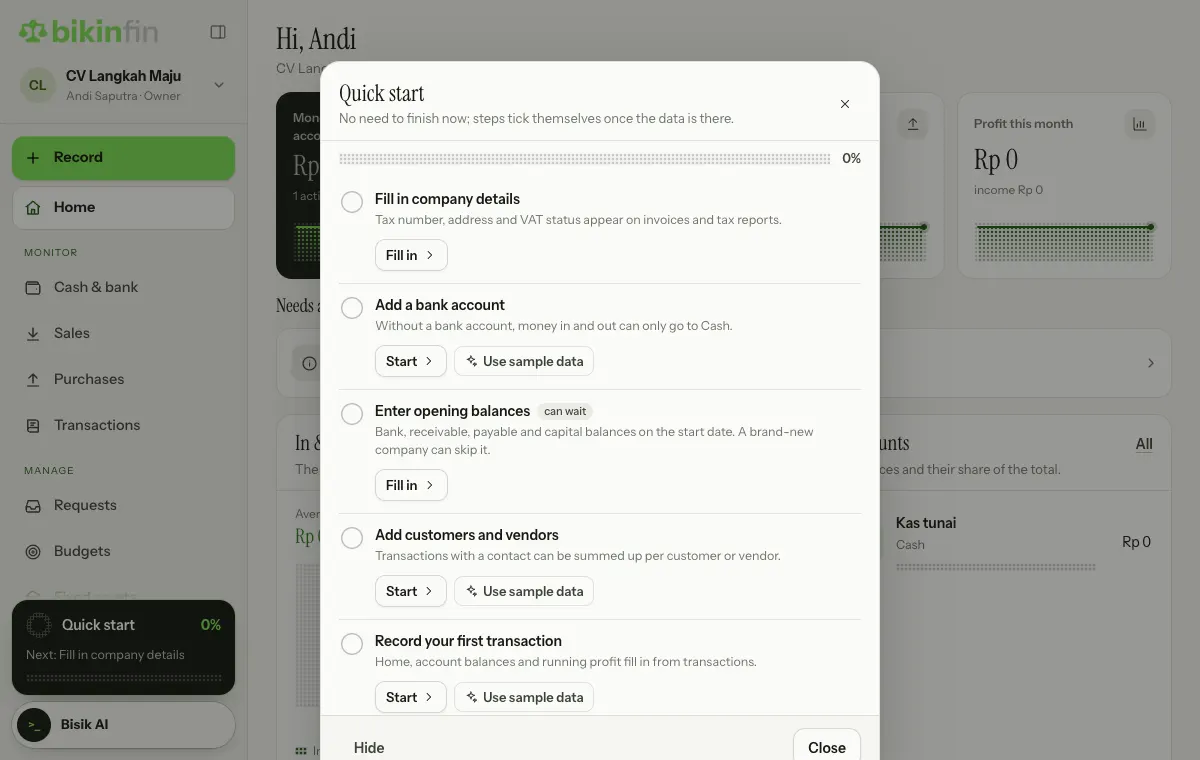
Opening balances and inviting the team are marked can wait, so they can follow later. Once the required steps are done, the card says "All steps done"; tap it, then tap Finish.
Sample data
Want to see Bikin Fin filled in first? From the Quick start list, choose Use sample data: a sample BCA account, three contacts and five transactions this month. Everything is marked Sample, uses its own CT-… numbers, and can be removed in one tap without touching real data. Sample data counts towards your plan like regular data.
To hide Quick start, choose Hide in its list. Open it again any time from Settings › Account, the Getting started card, with Replay the guide.
Company details and opening balances
In the sidebar, Data group, open Company. The first tab, Company details, shows the Legal and tax details card.
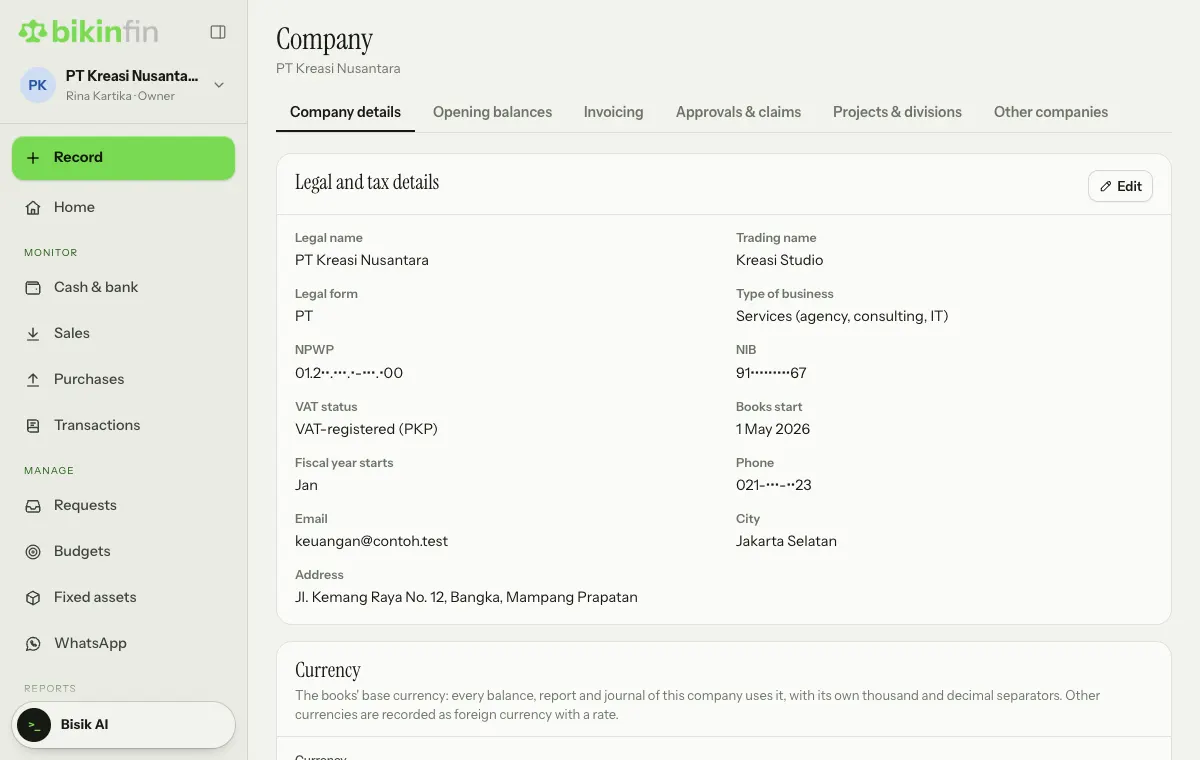
Choose Edit at the top right of that card. The important fields:
- Legal name, NPWP (tax number), Address and Phone.
- VAT-registered (charges VAT): switch it on if your company is VAT-registered (PKP). Invoices only carry VAT when the company is VAT-registered.
- Books start: the opening balance date. Transactions before this date can't be recorded.
- Fiscal year starts in: the first month of your fiscal year, usually January.
Currency
Below that card, the Currency card sets the base currency of the books: every balance, report and journal of this company uses it. Thousand and decimal separators follow that currency, such as Rp 1.250.000 for Indonesian rupiah and RM 1,250.50 for Malaysian ringgit, and amount fields add the thousand separators as you type. A new company gets the currency of the country it signs up from. Check it before entering opening balances.
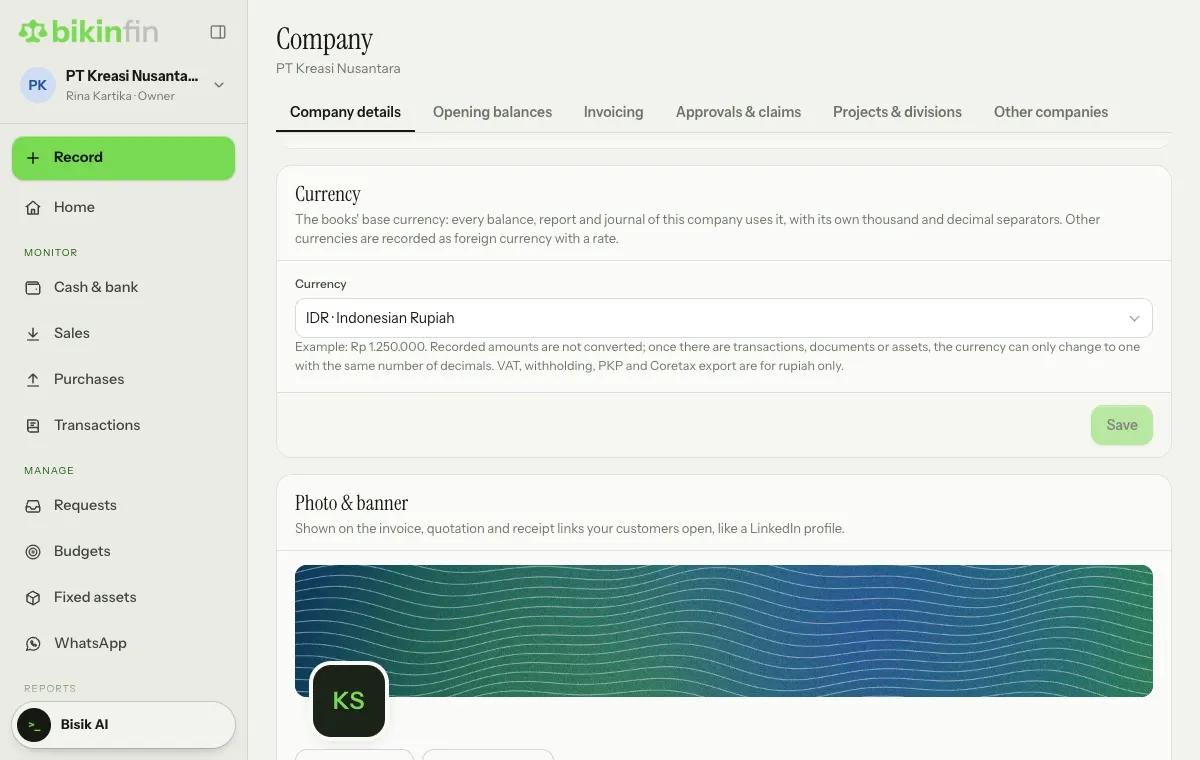
- Only the owner changes it: pick a currency in the list (type in the search box to find it), then Save. Other roles see the card with Only the owner changes it.
- Until there are transactions, documents or assets, you can change the currency freely. After that it can only change to a currency with the same number of decimals, because recorded amounts are never converted, and never to a currency this company already uses as a foreign currency.
- Other currencies, rupiah included when the base currency isn't rupiah, are recorded as foreign currency with a rate to the base currency, on plans with foreign currency.
- VAT, withholding tax, VAT registration (PKP) and the whole Tax menu (tax calendar, period recap and Coretax export) are only for companies that use Indonesian rupiah (IDR). With another currency they are locked, marked Only for businesses that use Indonesian rupiah (IDR), and moving away from rupiah switches VAT registration off.
- Bikin Fin plan prices, bills, coupons and referral commission stay in rupiah.
Opening balances
Next, open the Opening balances tab. Enter bank balances, receivables, inventory, fixed assets, payables and capital on the books start date, from your last balance sheet or bank statements, then choose Save opening balances. Any difference between debits and credits goes to the Opening balance equity account; ask your accountant to move it to Capital or Retained earnings afterwards. Old receivables and payables per customer or vendor can be recorded as invoices or bills with the Old receivable or Old payable option on the form, so they can be collected and settled without double-counting the opening balances (see Sales).
Several companies
The owner can add another PT or CV from the company card at the top left: tap the company name, then choose Add a company. A new company gets its own books with a chart of accounts for its type of business. To switch company, tap the same card and pick the company you want. The number of companies follows your plan.
Profile photo
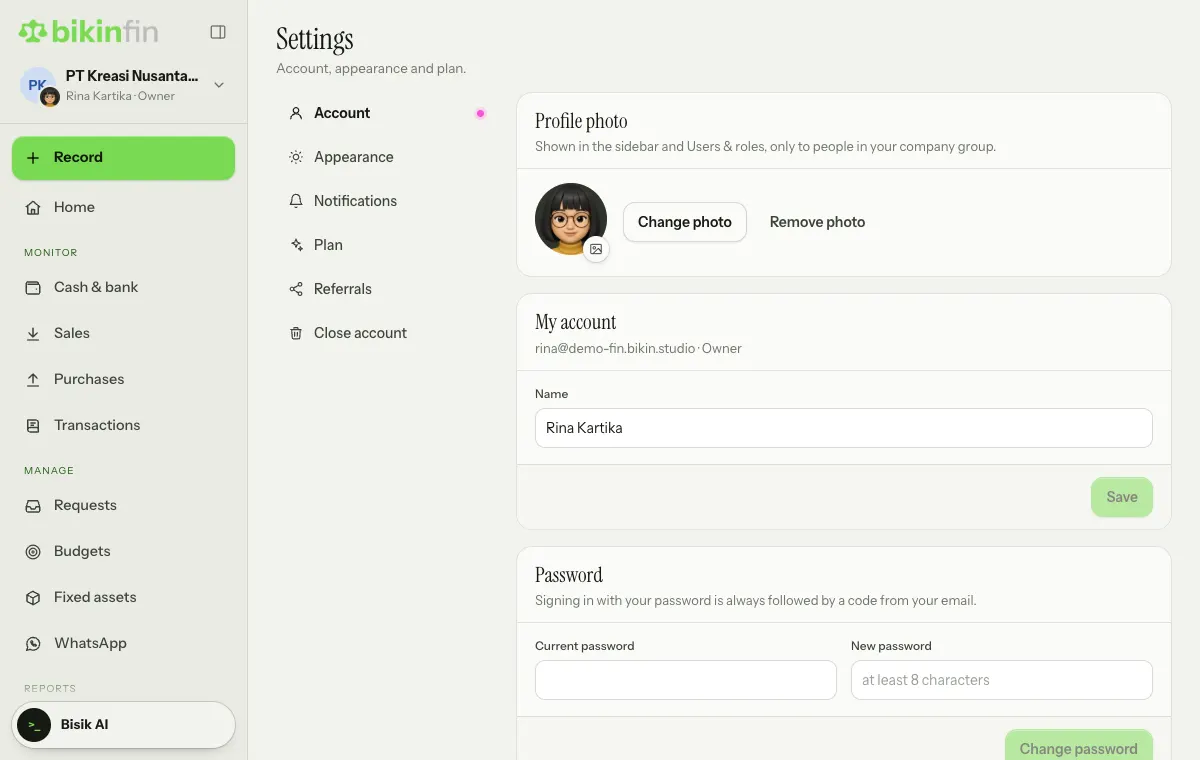
The Profile photo card in Settings › Account shows your photo as a small badge on the company avatar at the top of the sidebar and in Users & roles. Choose Upload photo (or drag an image onto the card), then a JPG, PNG or WebP image; in Adjust your photo, drag the photo and use the slider to zoom, then choose Save photo. It's cropped square and shrunk on your device before upload. Change photo uses another image, and Remove photo goes back to your initials. Only people in your company group see your photo, it never appears on invoices or public links, and it's deleted when you're switched off or your account is deleted. The company photo is set separately in Company › Company details, card Photo & banner.
Recording and monitoring
Everything is recorded through one Record button: the green button above the sidebar menu, on computers and tablets and in the sidebar drawer on phones. Pick what happened, e.g. Cash & bank › Money in, then fill in the account, what the money was for, and the amount. The journal is written for you. See Transactions.
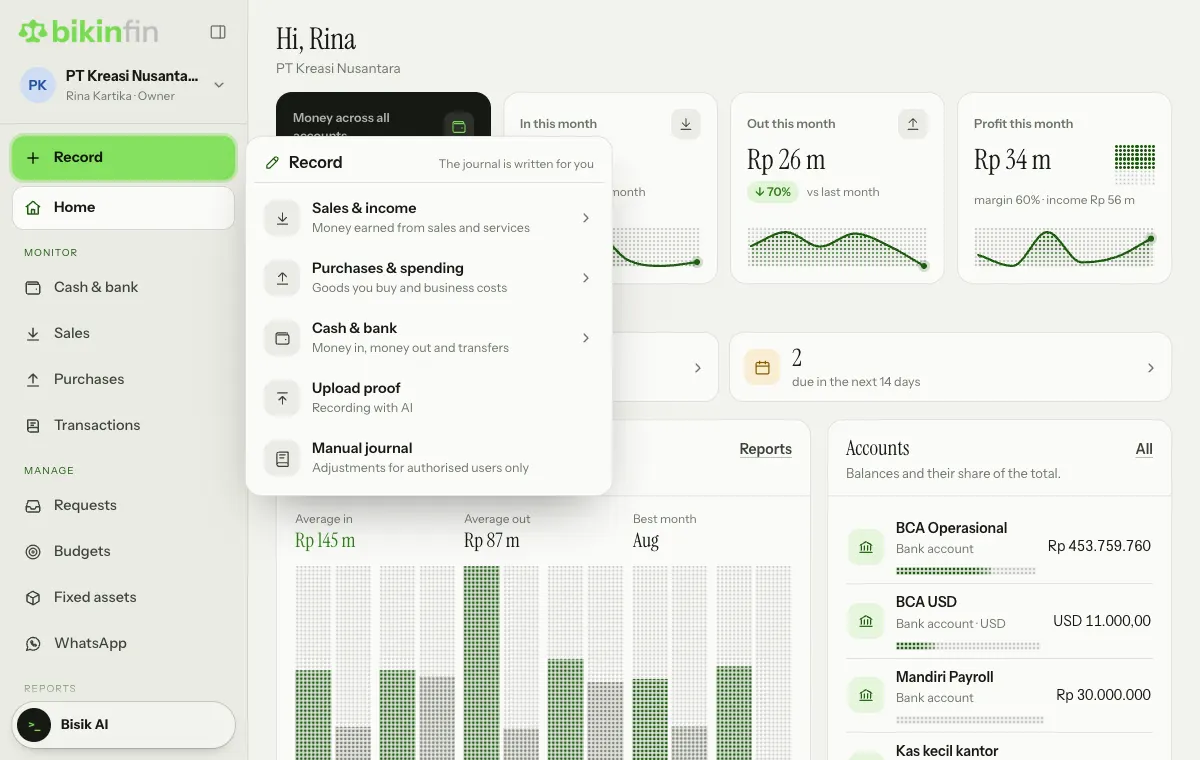
Home sums up the company's money in four key numbers: Money across all accounts, In this month and Out this month (compared with last month), and Profit this month with its margin. Below them, Needs attention gathers what is waiting for action as tiles that take you straight to the right page: proofs waiting to be checked, requests waiting for you, tax obligations past their date, tax and asset reminders due in the next 14 days, cash expected below the safety floor, and opening balances not entered yet. Then come the In & out card (the last six months), Accounts (each account's balance and share), How long will cash last? (the 13-week cash forecast), Coming due (tax and asset reminders in the next 14 days) and Latest transactions.
Below Home, the sidebar menu is grouped by purpose:
- Monitor: Cash & bank, Sales, Purchases and Transactions, where you follow balances, documents and the bookkeeping history. New entries are always made with Record.
- Manage: Requests, Budgets and Fixed assets.
- Reports: Reports, Tax and Month close.
- Data: Contacts, Chart of accounts, Company, Users & roles and Settings.
The menus you see follow your role and plan.
Notifications
In Settings › Notifications you choose how you hear about things: by email, by push to your devices, or not at all, per event. If you had turned off notification emails before, Email stays off until you turn it on here.
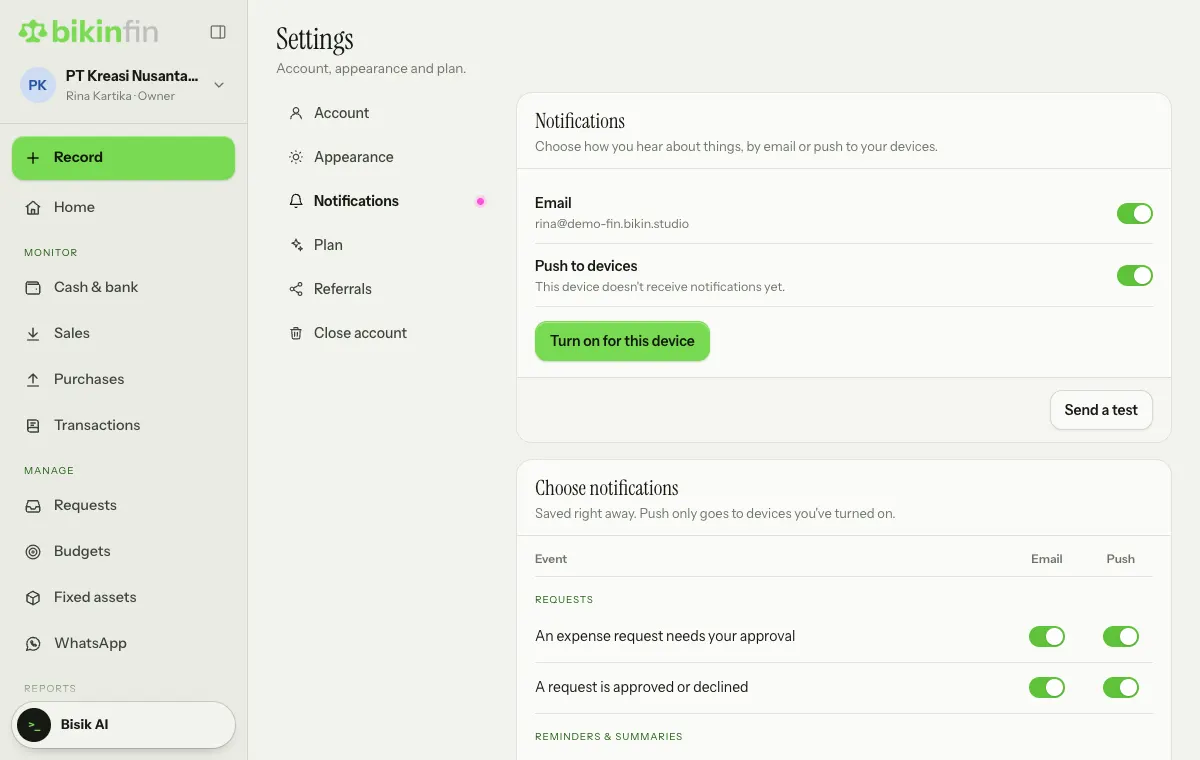
- Email goes to your account address. By default it's on for every event: requests waiting for your approval, request decisions, tax and asset deadlines, and the Monday summary for owners.
- Push to devices: tap Turn on for this device and allow it in your browser. Do it on every phone or computer that should get notifications; Turn off on this device stops it. On iPhone, push only works once the app is on your home screen (Share › Add to Home Screen).
- Send a test sends one test notification to your active devices and your email, so you know everything arrives.
- Demo accounts don't send emails or push notifications.
Next steps
- Cash & bank to add accounts.
- Transactions to record with Record and check the results.
- Roles & access before inviting your team.
Last updated: