Bikin POSFeatures
Register
How to sell on the Bikin POS register: choosing products, variants, add-ons, discounts, customers and order types, and saving orders.
The Register is the main screen of Bikin POS and the first menu in the sidebar. Tap a product to add it to the order, press Pay, then choose how the customer pays. Owners, managers and cashiers can sell; kitchen staff can't.
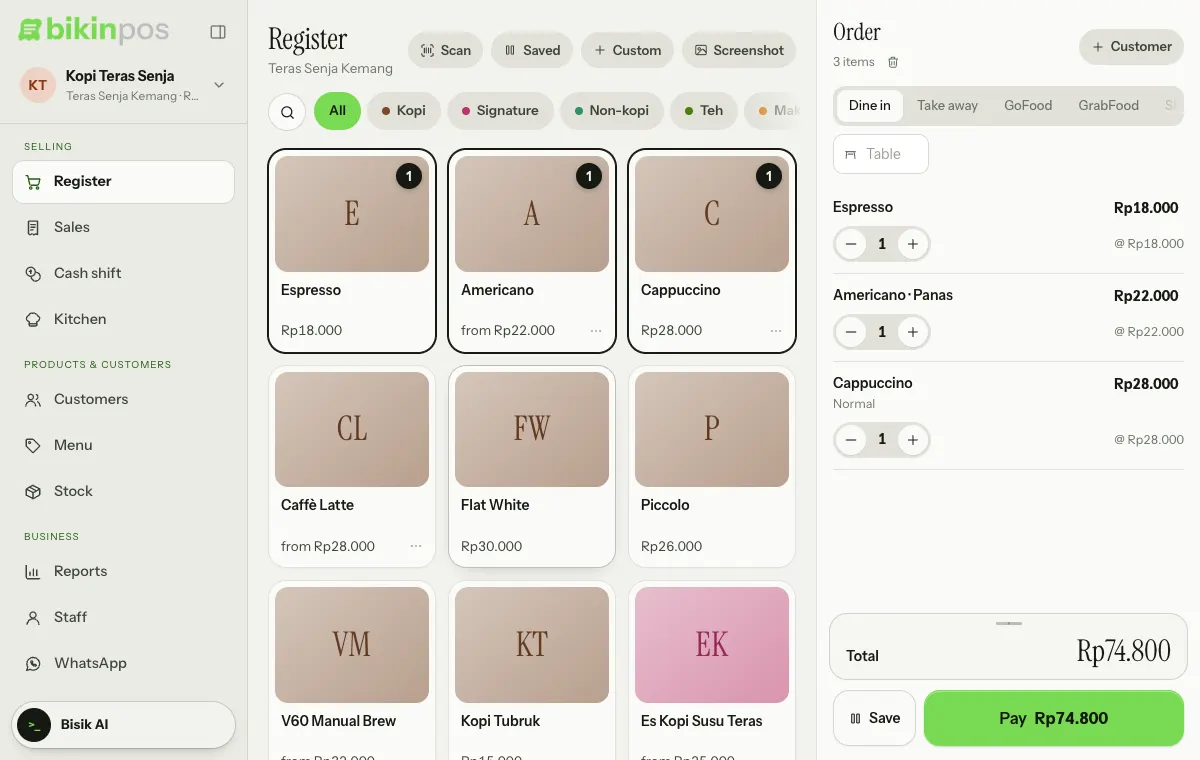
Layout
- Tablet and computer: products on the left, the Order panel on the right. Above the products are the Scan, Saved, Custom and Screenshot buttons; this device's outlet name sits under the Register title.
- Phone: products fill the screen, and those buttons become round icons at the top right. Once there are items, a dark bar at the bottom shows the item count and total. Tap it to open the order full screen, or press Pay straight away.
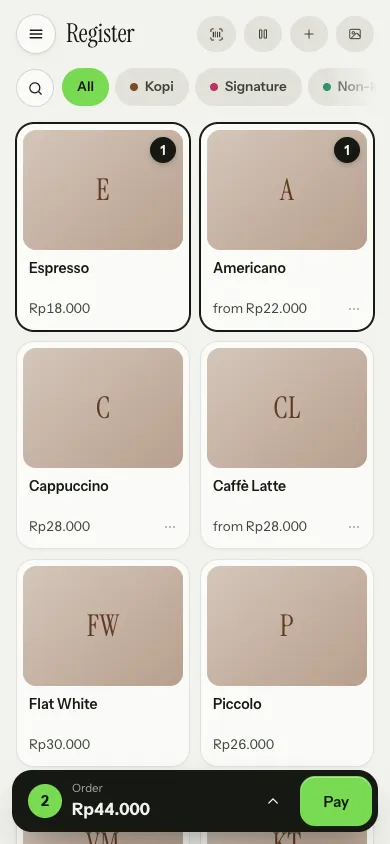
Categories show as a row of pills above the products, starting with All; swipe sideways when they don't fit. Each product tile shows:
- the price, or "from" and the lowest price when the product has several variants;
- a ··· mark next to the price when the product has variants or add-ons;
- a number in a black circle: how many of that product are already in the order;
- Left (running low) or Out, when stock is tracked.
Adding items
- Tap a product. A product without variants goes straight into the order.
- A product marked ··· or with an open price opens a choice window: Choose a variant, choice groups such as sugar level or toppings (labelled, for example, Pick 1 or Optional, up to 3), Quantity, Note (e.g. no ice, medium spicy), and Price when it's an open price.
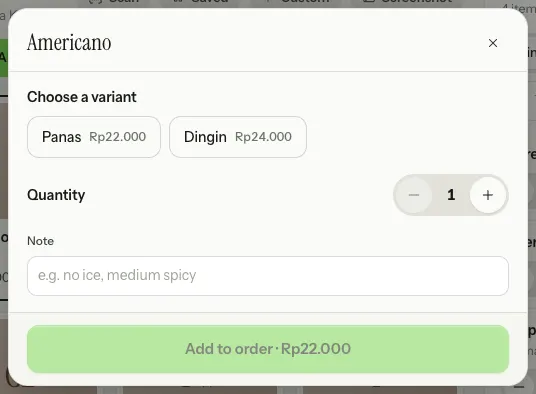
- Press Add to order. The button only turns on once the variant and any required choices are picked.
When stock runs out and Allow selling when out of stock is off in Settings › Register & security, the register refuses that product.
Searching and scanning
- Tap the magnifier icon at the left of the category row, then type a name, SKU or barcode. Press Enter to add the item whose barcode or SKU matches exactly, or the only search result. Esc closes the search.
- USB or Bluetooth barcode scanners work right away: scan while no field is active and the item goes into the order.
- Scan opens the camera in browsers that support it, such as Chrome on Android and computers. Point the camera at a barcode; the window stays open so you can scan several items, then press Done.
Custom items
The Custom button adds an item or service that isn't in your products yet, such as a delivery fee. Fill in the Name, Price and Quantity, then press Add to order. Custom items don't affect stock.
Changing an order line
Each order line shows its line total, with the unit price underneath (marked @). The − and + buttons on the line change the quantity quickly; bringing the quantity down to zero removes the line.
Tap the item name to open its details: Quantity, a Discount for that line, Note and Remove. The Unit price can be changed for open-price products, by owners or managers, and for delivery-app orders. Press Save to apply the change.
Order type, table and customer
- Order type shows as a row of buttons at the top of the Order panel when more than one is turned on, such as Dine in, Take away and GoFood. Swipe the row sideways to see the rest. The choices follow your business type. See Business types.
- The Table field below it shows when Table number on orders is on in Settings › Orders & discounts.
- The Customer button at the top right of the Order panel finds a customer by name or phone, or adds a new one. Once picked, the customer's name replaces the button text; the × next to it removes them again. See Customers.
Discounts
Tap the Total bar at the bottom of the Order panel (or pull it up) to open the total breakdown, then choose Add discount. Pick a saved discount, such as Member 10%, or Percent or Amount for a manual discount, then press Apply discount. A discount for a single item is given from its order line.
Cashiers can give manual discounts only when Cashiers can give manual discounts is on; saved discounts are always allowed.
The breakdown shows the subtotal, discounts, points, service charge, tax and rounding. The order of calculation is: discounts, service charge, tax, then rounding.
Saving orders (open bills)
Customer not paying yet? Press Save next to the Pay button, fill in an Order name (e.g. Rina) or Table, then press Save. The order is kept and the Order panel is empty again for the next customer.
Every waiting order is under the Saved button at the top of the Register, with a count. Tap an order in that list to open it again, from any device at the same outlet, or tap the bin icon to delete it. Opening a saved order replaces the order that's currently open, so save that one first if you still need it.
The bin icon next to the item count, under the Order title, clears the whole order after you confirm.
Empty catalogue
When there are no products yet, the Register shows Set up your products with the Add a product and Add sample products buttons, suited to your business type (for owners and managers). You can change or delete the samples any time in Products.
Last updated: