BIKIN WARUNGFeatures
Selling
The BIKIN WARUNG Sell screen: Manual, Scan and Recent modes, last prices and Choose a price, the pull-up cart, discounts per item, and putting a cart on hold for the next customer.
Every sale starts on Sell, in the sidebar menu or the green Sell button above it. At the top are three modes: Manual, Scan and Recent. The device remembers the mode you used last. Chosen items go into the cart: on phones it's the panel at the bottom of the screen, on wider screens it's the card on the right.
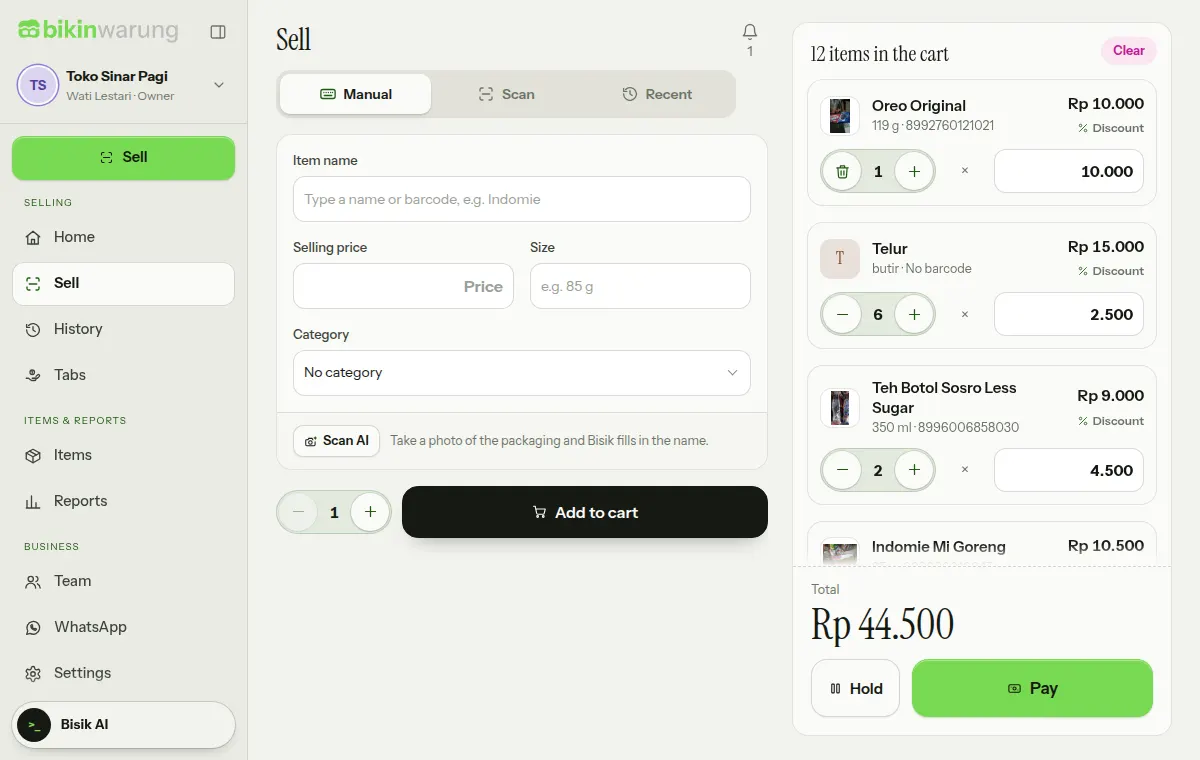
The Sell and Pay screens don't reload when you pull the screen down, so the cart is never lost by a stray swipe.
Manual mode: type the item name
Manual mode suits items without a barcode and items that are quicker to type.
- Type in Item name, for example "indomie". Suggestions appear as you type: your own shop's items first (with their price), then items from the shared database. Typos are fixed for you, and if nothing matches the list simply disappears.
- Pick the right suggestion. Size and Category fill in by themselves, and the price follows the price rules below.
- Set the quantity with − and +, then choose Add to cart. The fields clear for the next item.
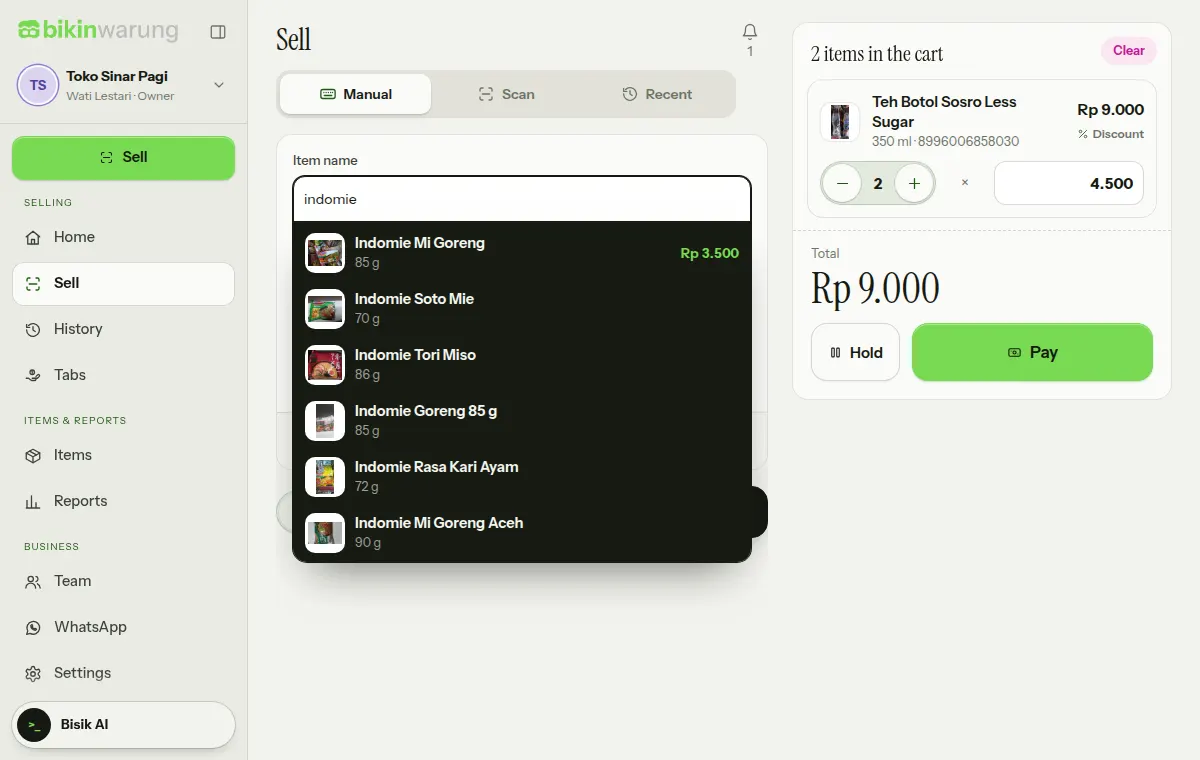
- A typed barcode (or one from a handheld scanner in that field), then Enter, goes straight into the cart. An unknown barcode sticks to the card as a New barcode until its name and price are filled in once; after that it's recognised.
- Items without a barcode that you type are remembered as your shop's items, so next time they show in the suggestions with their last price.
- Scan AI: choose Scan AI, then take a photo of the item's packaging. Bisik reads the packaging and fills in its name, size and category; you just check it and set the price. The photo isn't kept, and the number of Scan AI reads per month depends on your plan.
Scan mode: the camera
In Scan mode the whole screen becomes a camera with a scanning frame. Point the barcode into the frame; every barcode that's read becomes a card in the row at the bottom, the newest on the far left.
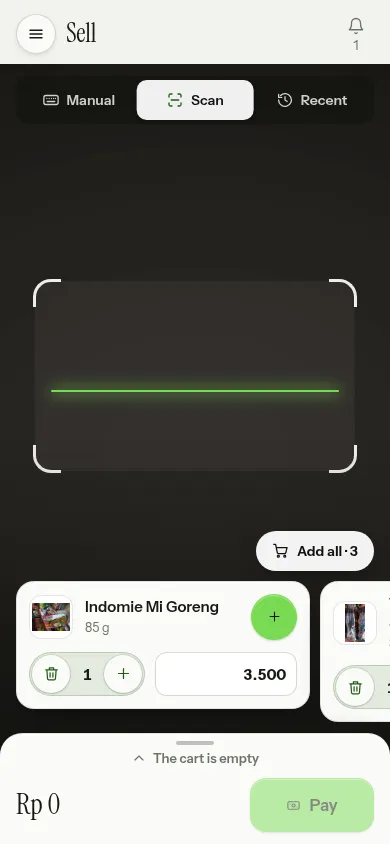
- Each card shows the picture, name, size and where the price comes from, with the quantity (− at 1 removes the card) and the price. Choose the green + to add it to the cart.
- Scanning the same barcode again adds to that card's quantity. An unknown barcode becomes a New barcode card with Add name and price, which opens Manual mode with the barcode filled in.
- A card without a price shows Choose a price. With several cards, Add all adds every card that already has a price in one go.
- Torch shows when your phone's camera has a light.
Every barcode that's read shows a tick with the item name, a short sound and a vibration, and every item added makes the cart shimmer. You can switch the sound off in Settings › Appearance.
The camera only works over https, so it's always there on warung.bikin.studio. If the camera isn't allowed yet, allow it for this site in your browser settings, or type the barcode in the field that appears.
Handheld scanners (USB or Bluetooth) work in every mode: they type the barcode very fast, then Enter. In Scan mode the result becomes a card; in the other modes the item goes straight into the cart.
Recent mode: items just bought
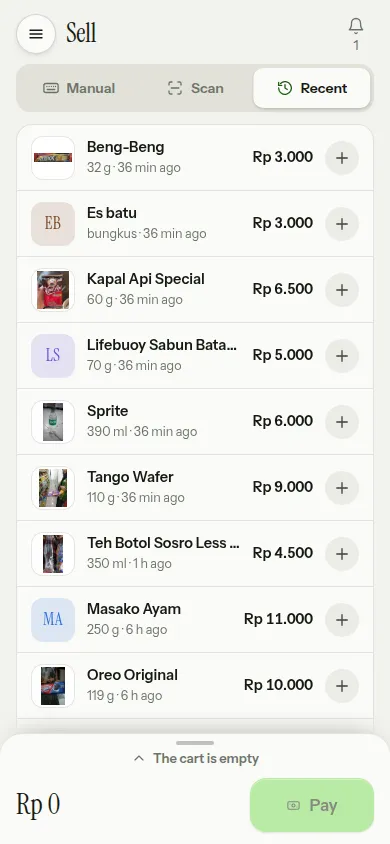
Recent mode lists up to 50 items customers just bought, from every cashier, plus your quick buttons. Tap an item to add it to the cart; items already in the cart show their quantity.
Prices
In the cart, on scan cards and in Manual mode, the price is always a field you can change.
- Items you have sold before use their last price straight away. If you change it, the new price becomes that item's price for the next sale.
- Items you haven't sold yet that have a recommendation show Choose a price. The Selling price sheet has two options: the Recommended price, with where it comes from, or Set my own price. Pick one, then Use Rp ….
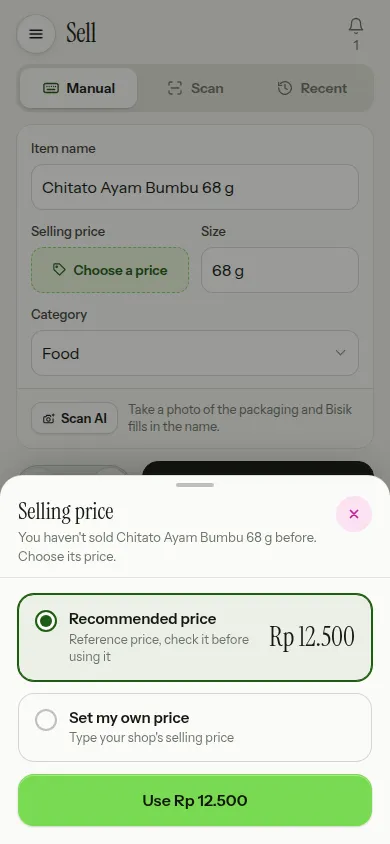
Where a recommended price comes from is always shown:
| Label | What it means |
|---|---|
| Commonly used by other shops | The price many other shops commonly use for this item, without their names |
| From other shops | The price from one or two other shops, so it's worth checking |
| Reference price, check it before using it | A price from the shared item database, which may differ from prices in your area |
An item with no price at all waits for you to fill it in, and Pay can't be pressed until every item has a price. Cashiers can only change prices if the owner switches on Cashiers may change prices and give discounts in the cart in Settings › Business, and a cashier never changes an item's remembered price.
The cart
On phones the cart is a panel at the bottom of the screen with the total, Hold and Pay. Its label sits in the middle: The cart is empty, then N items in the cart once there's something in it. Tap the label or pull the panel up to open it, almost to the full height of the screen; tap again, pull it down or tap the background to close it. On wider screens the cart is always open in the card on the right.
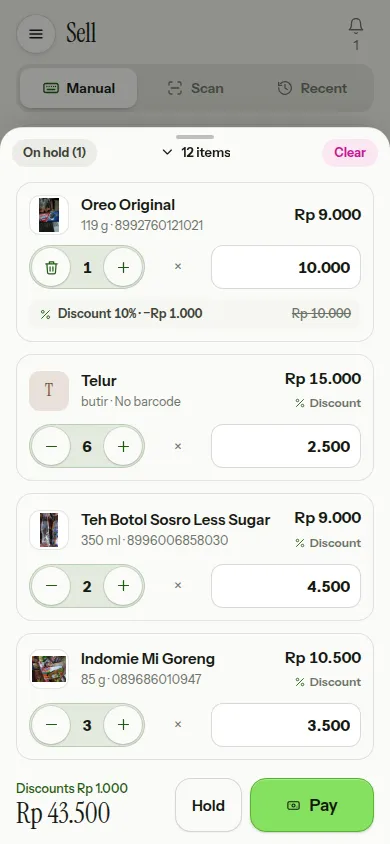
Each line has the picture, name, subtotal, quantity and price:
- − and + change the quantity; − at 1 removes the line. Tap the number to type a quantity, including fractions such as 0.5.
- The price field can be changed right there.
- Discount gives a discount on that line (see below).
- Clear at the top of the panel removes every item after you confirm. Finished sales aren't changed.
Discounts
A discount can be given on one item or on the whole sale, without a field that's always on screen.
- On one item: choose Discount on a cart line that has a price. In the Discount sheet, choose Rp or %, enter the amount, then Apply · saves Rp …. The line then shows its discount, such as "Discount 10% · −Rp 1.000", with the price before the discount struck through. Tap that text to change it or Remove discount.
- On the whole sale: choose Discount in the summary on the Pay screen. See Payment & receipts.
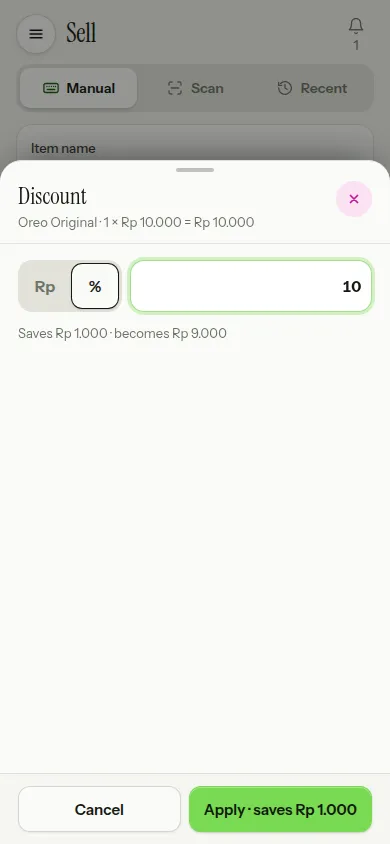
While there's a discount, the cart panel shows the total discount above the total. A discount never takes a price below zero. The item's remembered price stays the price before the discount, so a discount for one customer doesn't change the price for the next. Cashiers can only give discounts if the owner allows it in Settings › Business.
Putting a cart on hold
Customer forgot something, or went to get money? Put the cart on hold and serve the next customer.
- Choose Hold next to Pay. The cart is kept as Customer 1 (then Customer 2, and so on) and the cart is empty again. Choose Name it in the message if you'd like to give it a name.
- The On hold (N) chip at the top of the cart opens the Carts on hold sheet: name, total, number of items and when it was put on hold.
- Choose Resume when the customer comes back. If the cart has items in it, that cart is put on hold first, automatically, so nothing is lost.
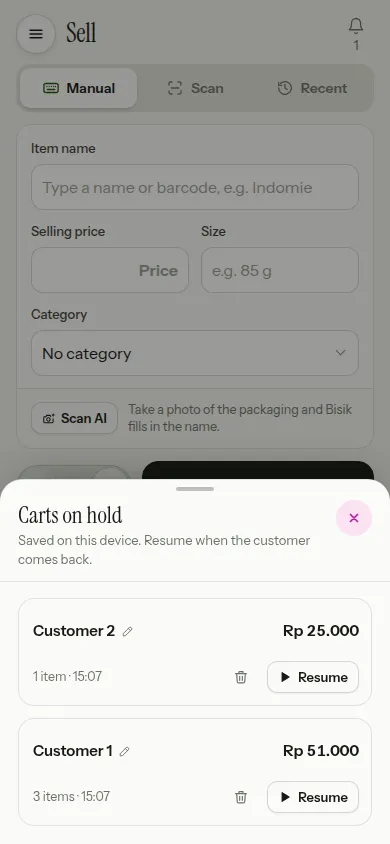
Up to 10 carts can be on hold. Carts on hold are kept on this device only, for the person who held them, so they stay even without internet. A cart is never thrown away silently: it only goes when it's resumed, deleted after you confirm, or when you Sign out on that device.
Next steps
Cart ready? Choose Pay. See Payment & receipts.
Last updated: