Bikin HRFeatures
Check-in
How to set work locations and check-in methods in Bikin HR, then check in by phone (GPS, selfie, office WiFi, QR, field visits) or on a kiosk tablet.
Employees check in by phone at the work locations you set, or on a kiosk tablet at the door. Several methods can be on at the same location. Check-in times always come from the server (WIB), not from the phone's clock.
The Check in menu only appears for accounts linked to an employee record (see Roles & access).
Set up work locations
Without a work location, employees can't check in by phone. The Owner or an HR admin sets it in Company › Locations & structure, on the Work locations card.
- Press + Location on the right of the card. In the New location window, enter a Name (for example Head office) and the Address.
- Set the GPS point (Latitude and Longitude). The easiest way: stand at the place and press Use my current location.
- Fill in Radius (m): how far from that point still counts as being there. The default is 100 m.
- To allow check-in over the office WiFi, fill in Office WiFi IPs (optional, comma separated).
- Turn on the switches you want under Check-in methods here, make sure Active is on, then press Save.
Make sure each employee has a Work location on the Work tab of their profile. To change a location, tap its name on the Work locations card.
Methods you can turn on
| Method | What it means |
|---|---|
| Phone: GPS inside the radius | Phone check-ins are accepted when the position is inside the radius |
| Selfie required on phone | Employees take a selfie when checking in; the photo is kept for review |
| Phone on office WiFi (IPs below) | Phone check-ins are only accepted from the office WiFi (the IPs you entered) |
| Kiosk tablet (face, PIN, card) | Check in on a tablet with face, PIN or QR card |
| Dynamic QR on the kiosk screen | The kiosk shows a QR that changes every 30 seconds, scanned from a phone |
| Field visits (outside the radius) | Check in outside the radius with a photo and a note, for sales or technicians |
Methods your plan doesn't include are marked Upgrade and their switch can't be turned on. The number of locations and kiosk tablets is limited by your plan too.
Check in by phone
- Open the Check in menu. At the top are your work location and the date, the server clock (WIB) and today's shift.
- Press the big Check in button when you arrive. The line under the button shows the method in use, for example GPS + selfie.
- Allow location access (and the camera, if a selfie is required). When you leave, open the same menu and press Check out.
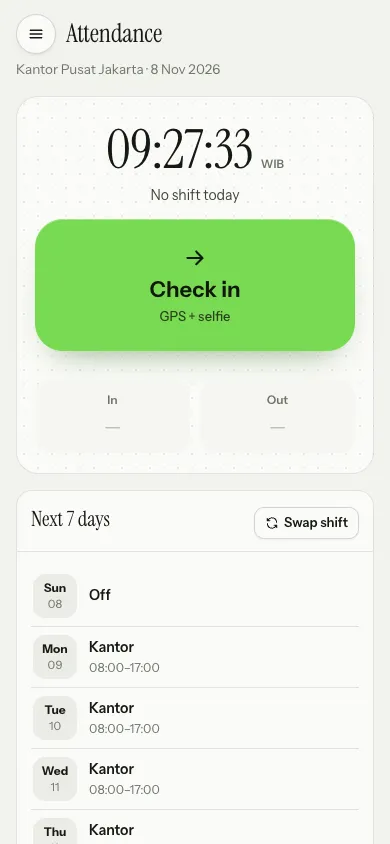
Other buttons appear depending on the methods that are on: Scan kiosk QR for the dynamic QR, and Field visit to check in at a client's place with a photo and a note. Below them is the Next 7 days card with the Swap shift button (see Schedules & attendance).
Location not reading? Allow location for Bikin HR in your browser settings, then try again in an open spot.
Check-ins that need review
A check-in is still recorded but flagged needs review when, for example, the GPS position is imprecise at the edge of the radius, it was sent from a kiosk that had been offline, or the face match was uncertain. Managers, HR admins or the Owner check them in Attendance › Review.
Kiosk tablet
A kiosk tablet suits shops, factories or offices where many employees don't carry a phone at work.
Pair a tablet
- In Company › Locations & structure, tap the location. Make sure Kiosk tablet (face, PIN, card) is on and the location has been saved; the Kiosk tablets section only appears after that.
- In the Kiosk tablets section, tick the check-in methods for that tablet (Face, PIN, QR card, Dynamic QR), then press Pair a tablet. An 8-digit code appears with the time it is valid until.
- On the tablet, open the kiosk address shown (hr.bikin.studio/kiosk) and enter the code.
- The tablet is now paired to that location. It is listed under Kiosk tablets, with when it was last seen.
A lost or replaced tablet can be removed with the bin icon on its row (Remove); it stops working for check-in at once.
Ways to check in at the kiosk
- Check in with face: look at the camera and follow the prompt (blink or turn your head), so a photo or a phone screen can't be used.
- PIN: pick your name, then type your attendance PIN.
- QR card: show your attendance card to the camera.
- Dynamic QR: employees scan the QR on the screen with Check in › Scan kiosk QR on their own phone. It changes every 30 seconds, so it can't be photographed and sent to a friend.
When the internet drops, the kiosk keeps accepting check-ins, saves them on the tablet and sends them on its own once it's back online. These check-ins go to the review queue.
PIN, card and face data
Set on the Attendance tab of the employee profile (by HR), or in My profile by the employee:
- Attendance PIN: 4–6 digits, stored as a hash. Type the PIN, then press Save PIN.
- QR attendance card: print it and carry it (Show card, then Print). HR can replace a lost card with Replace; the old one stops working at once.
- Face data: press Record face. Before recording, the employee reads the Face data consent, ticks their agreement, then presses Agree and continue. When HR does the recording, HR also ticks that the employee agreed in person. Only encrypted face feature numbers are stored, not a photo. The employee can withdraw consent any time with Withdraw (HR: Delete), and the data is deleted at once. People who say no can still check in with a PIN or card.
Owners and HR admins can tune face matching on the Face check-in card (Locations & structure tab): the Similarity threshold and the Minimum lead over the next person. The higher the threshold, the stricter the matching. Results below the threshold go to review or are asked to use a PIN.
Recording attendance by hand
Forgot to check in, or the phone broke? In Attendance, press Record by hand at the top right. In the Record attendance by hand window, choose the Employee, the Type (In or Out) and the Time (WIB), then write the Reason (required, for example the phone died and it was checked on CCTV). Press Save.
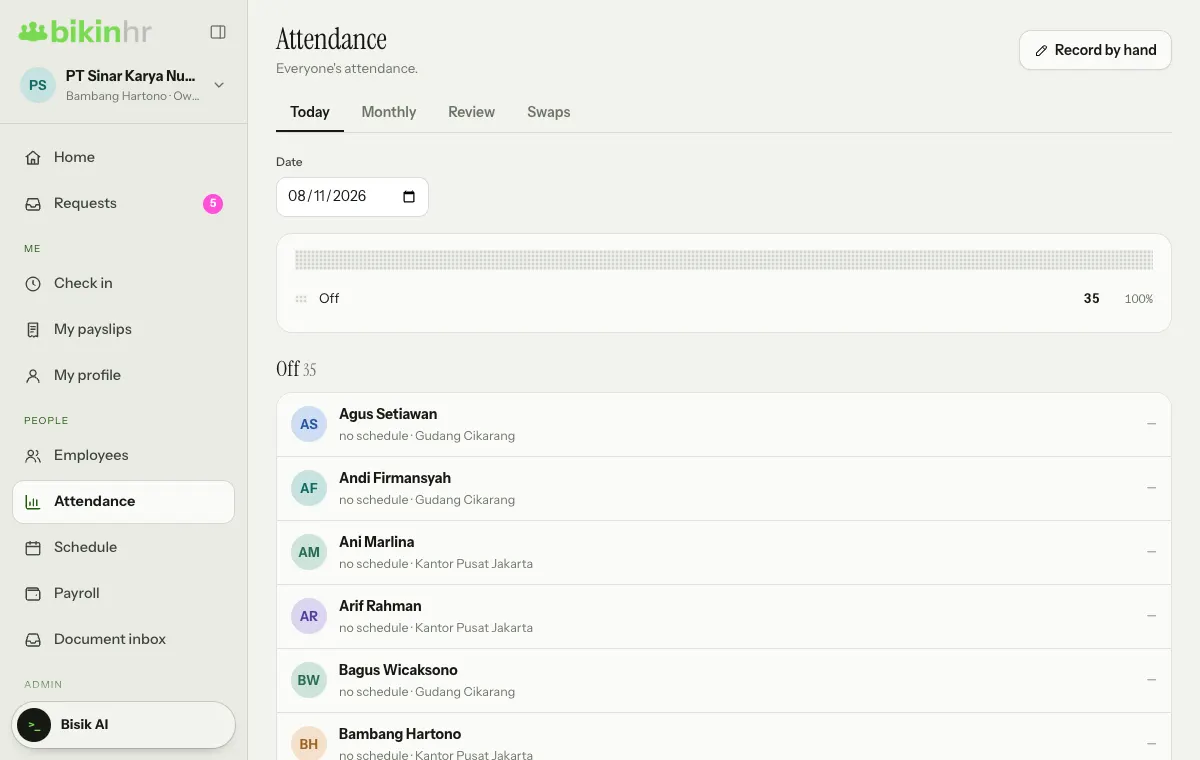
Manual entries are written to the access log along with who recorded them.
Last updated: