BIKIN SPRINTFeatures
Client link
Share a BIKIN SPRINT project with your client without an account, choose what they see, lock it with a password, and let the client approve work or ask for changes.
BIKIN SPRINT doesn't use guest accounts. Clients follow a project through a client link: a page that opens without an account and looks good when shared in the project's WhatsApp group. You decide what the client sees.
Sharing a project
- Open the project, then choose Share at the top right of the project header, next to the + Task button.
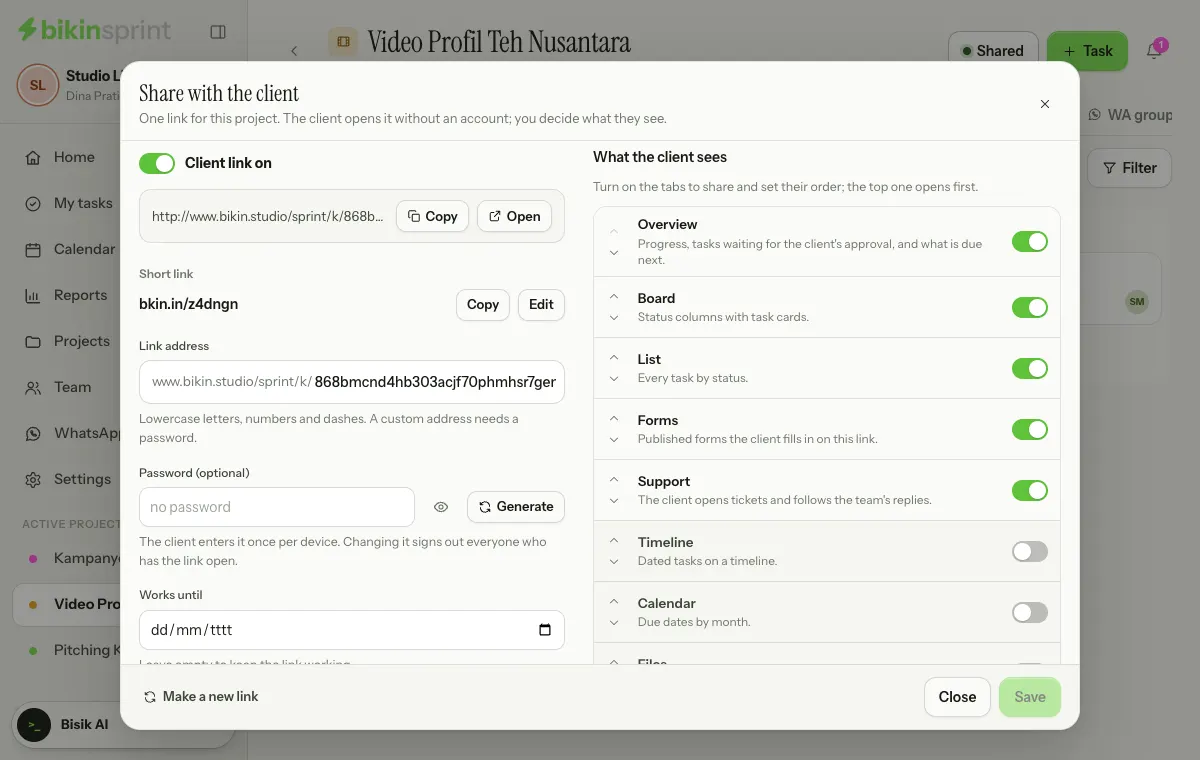
- Leave Client link on, set the address, password, end date and the tabs the client sees (see below), then choose Save.
- Once saved, the link address shows under the switch. Choose Copy and send the address to your client, or Open to see the page the client sees. When the link is locked, Copy link and password at the bottom of the left column copies both at once.
The button in the project header changes to Shared while the link is on. Only the project's managers (and the workspace's admins and owner) can manage the link. Client links are available when your plan includes them.
Address, password and end date
- Link address. Leave it empty for a random address, or write your own with lowercase letters, numbers and dashes, for example
kopi-senja-1212. BIKIN SPRINT checks that it's still free. A custom address always needs a password so nobody can guess it. - Password. Optional for a random address, at least 6 characters. Choose Generate for a strong one; the eye icon shows or hides it. The client enters it once per device. Changing it signs out everyone who has the link open.
- Works until. Pick a date if the link should only open until a certain day (WIB); leave it empty to keep the link working. After that the client sees that the link has ended. Pick a later date to open it again.
- Make a new link at the bottom left of the popup creates a new random address; the old one stops working straight away. Turning the Client link switch off closes the page, and your settings stay saved for when you turn it on again.
bkin.in short link
While the client link is on, the Share window also shows its short link; only project managers can change the code. Under the link is the Short link: a short bkin.in address made for you right away, for example bkin.in/k7m2qa. The real link doesn't change; bkin.in just sends visitors there.
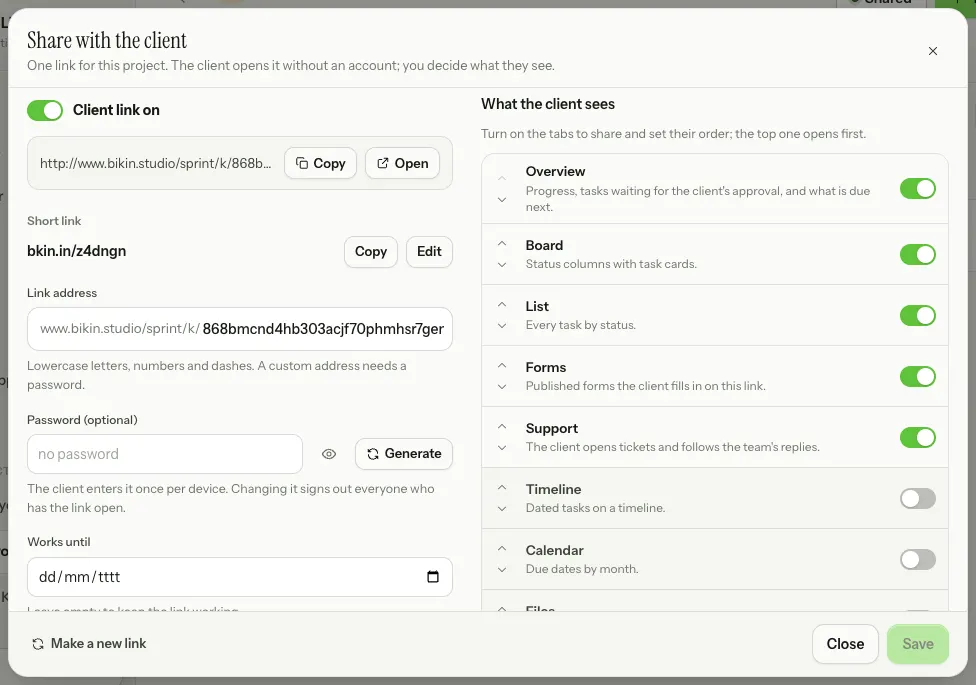
- Copy copies the short link.
- Edit picks your own code, for example
bkin.in/promo-coffee. Availability is checked as you type. Free plans need at least 6 characters, paid plans at least 3. Use lowercase letters, numbers and dashes. The old code stops working once you save. - Anything after the short link, such as
?ref=…, is passed on to the real link.
What the client sees
In the right-hand What the client sees column, turn on the tabs you want to share and set their order with the up and down arrows at the left of each tab. The top tab opens first. The Forms and Support tabs can't be turned on when those features are off for the project.
| Tab | What it shows |
|---|---|
| Overview | Progress by status, tasks waiting for the client's approval, and what is due next |
| Board | Status columns with task cards |
| List | Every task by status |
| Timeline | Dated tasks on a timeline, with a marker for today |
| Calendar | Due dates by month |
| Files | Task attachments: all of them, or only the ones you pick |
| Activity | Tasks added, moved, renamed or rescheduled, and client approvals |
| Forms | Forms you publish, filled in by the client on this link |
| Support | The client opens tickets and follows the team's replies |
Below the tab list, you can also choose whether the progress percentage shows at the top of the page, whether the project brief shows, and whether the client can approve or ask for changes. When the Files tab is on, choose All attachments, or Choose to share only certain files.
Tasks show only their title, status, dates and checklist progress. Never shown: tasks marked Internal, task descriptions, team comments, assignees, WhatsApp group messages and time logs.
Client approvals
Tasks in a Review status (a status named "Client review" if there is one, otherwise the last Review status) appear on the Waiting for your approval card in the Overview tab. The client can type their name, then choose:
- Approve: the task moves to the Done status.
- Ask for changes: the client writes what should change. The task moves to the Revisions status if there is one, otherwise to the first in-progress status, and the note is added as a "Revision from the client" comment.
Both are recorded in the task's activity, and the project's managers and the task's assignees get a notification in the bell. Review statuses come ready with the Agency / creative template (Internal review and Client review) and the Startup / product template (Review). Other projects can mark their own with Needs review in the project's Settings › Status; if there is no review status yet, the Share popup reminds you.
Preview when shared
When the link is shared on WhatsApp, its card shows an image with the project name, the client's name, your workspace's name and the START and END dates. The image is made automatically when a project manager opens the project, and is redrawn when the name or dates change. The progress percentage isn't in the image; the client sees it on the page.
Privacy
Search engines don't index client links or their preview images. Link passwords are stored encrypted. Visitors' IP addresses aren't stored as they are; the hourly attempt limits use a masked fingerprint. The settings and the preview image are deleted when the project is deleted or the workspace is closed. Share the link only with the client concerned.
Photo and banner
Client links open with the workspace banner at the top and the workspace photo on its bottom edge, like a LinkedIn profile. Set it in Settings › Workspace, card Photo & banner: Upload photo, then Change banner. The same photo shows on the workspace card in the sidebar.
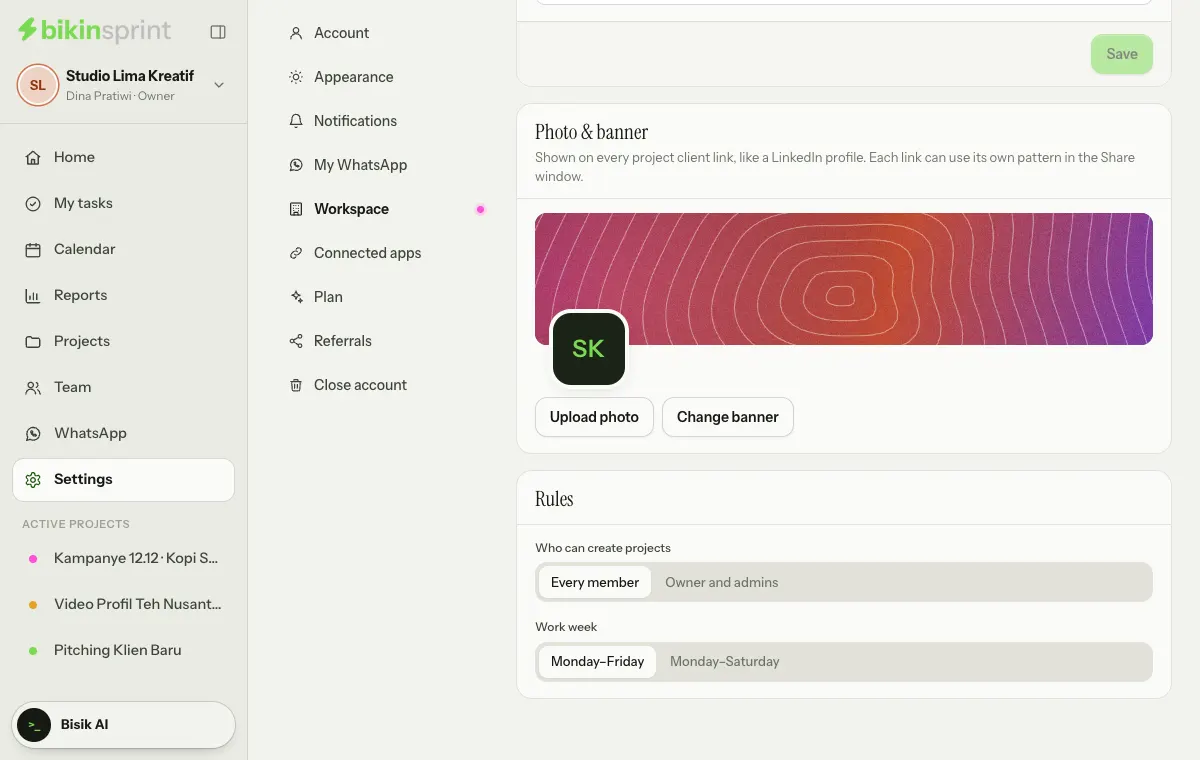
Choose Change banner: in the Pattern tab pick Grid, Waves, Rings or Silk and one of five colour sets (Shuffle gives a new variation); in the Upload tab choose a JPG, PNG or WebP image at least 600 px wide and drag the preview to choose the part that shows. Use default brings back the default pattern. The pattern moves gently on your customer's page and stays still when their device asks for reduced motion. Every plan can use the photo and banner.
One project can use a different pattern: in the Share window, Banner section, choose Own pattern, then Pick a pattern. Same as workspace goes back to the workspace banner. Uploaded images can only be set on the workspace.
Last updated: