Bikin AsetGet started
Get started with Bikin Aset
Sign up or sign in to Bikin Aset, pick your type of business so categories and locations are ready, record your first asset, then finish the Quick start list.
This page takes you from signing up to your first recorded asset. Most steps only need doing once, by the owner.
Sign up
- Open aset.bikin.studio/register, or choose Create one free on the sign-in page.
- Fill in Your name, Business name, Type of business, Email and Password (at least 8 characters), then choose Create account.
- Enter the 6-digit code sent to your email.
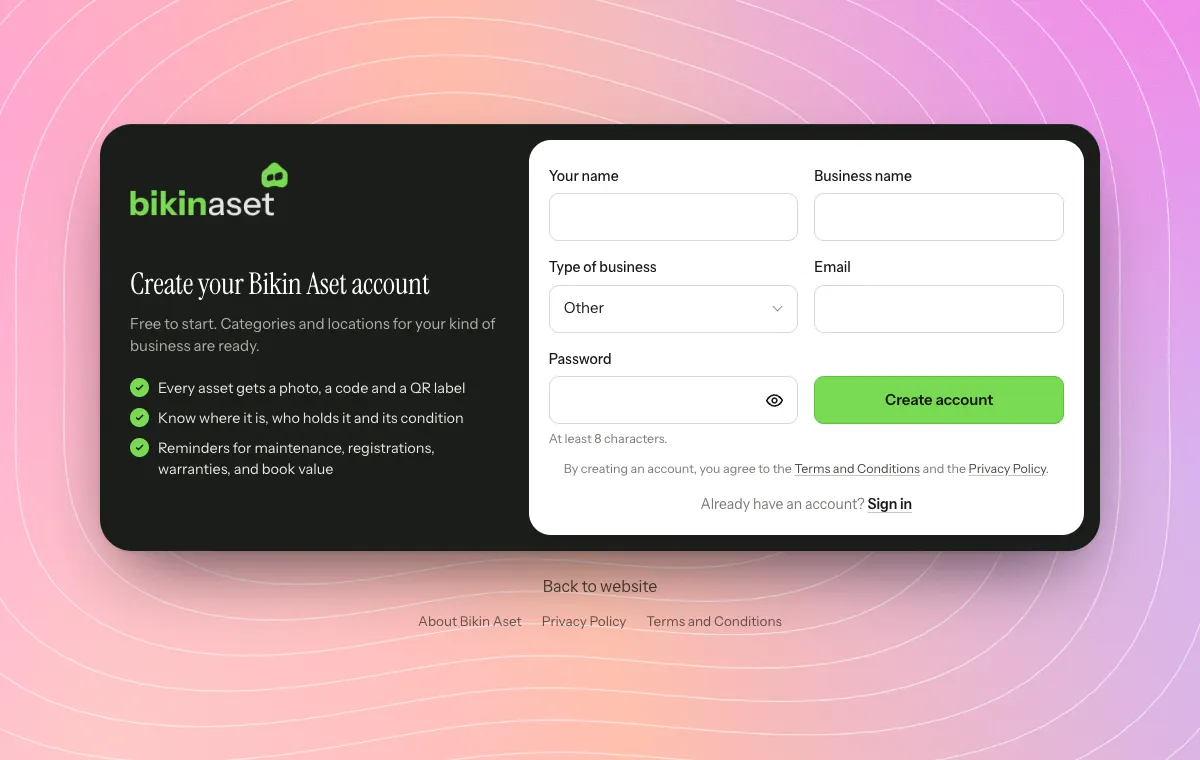
Type of business decides your first categories and locations. The types are grouped by sector, such as Food & drink, Shops & retail, Services & care, Offices & professionals, Health & education, Production, Property & construction, Transport, Agriculture and Sports & leisure. If yours is not listed, pick Other at the bottom. A café, for example, starts with the categories Kitchen & beverage equipment, Refrigeration, Point of sale & shop devices and Motorcycles, plus the locations Main outlet and Storeroom.
The type also names the locations menu: cafés, restaurants and shops see Outlets; salons, laundries, workshops, clinics and gyms see Branches; contractors see Sites; farms see Fields; other businesses see Locations. You can change the type in Settings › Business; only the wording and category suggestions change, and your existing data stays as it is.
When the button is shown, you can also choose Sign up with Google. The person who signs up becomes the Owner of that business, and new businesses start on the free plan.
If the sign-up link isn't shown, sign-up is closed for now. Contact BIKIN at contact@bikin.studio to get an account.
Sign in
- Enter your email and password, then choose Sign in.
- Enter the code from your email. It works for 10 minutes.
You then stay signed in on that device for 30 days. Choose Sign in with Google if your Google account uses the same email. Forgot your password? Choose Forgot password? on the sign-in page.
Welcome and Quick start
The first time you sign in, Bikin Aset shows a short welcome for your role; choose Skip to get straight to work. Owners and admins also get the dark Quick start card in the sidebar, right above Bisik (on phones, in the sidebar drawer). Tap the card to open the list of steps.
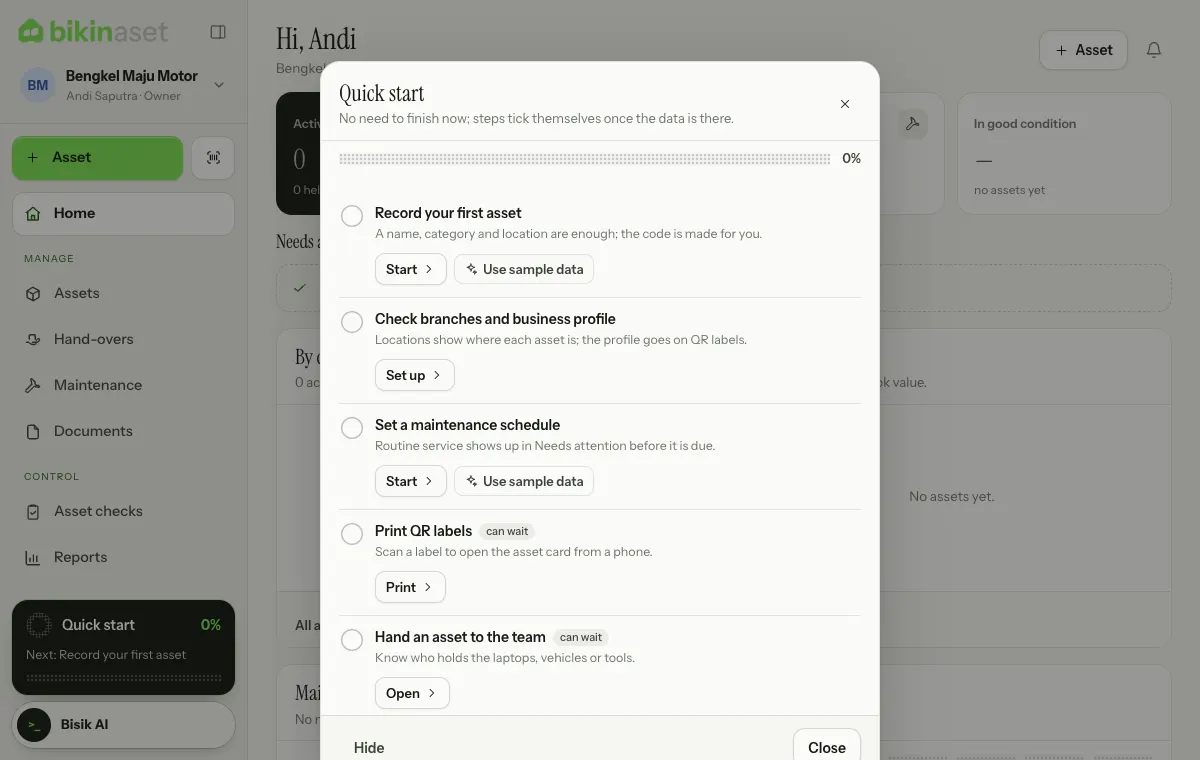
Each step says why it matters and has a button that takes you straight to its page:
- Record your first asset. A name, category and location are enough; the code is made for you.
- Check your locations and business profile (named after your location wording, such as Check branches and business profile). Locations show where each asset is, and the profile goes on QR labels.
- Set a maintenance schedule. Routine service shows up in Needs attention before it is due.
- Print QR labels, Hand an asset to the team, Store documents with expiry dates and Invite teammates, marked "can wait".
Once the required steps are done, press Finish. If you'd rather not see it yet, choose Hide. The welcome, Quick start and tips can be opened again from Settings › Account › Getting started.
Sample data
Want to see Bikin Aset filled in first? On Record your first asset or Set a maintenance schedule, choose Use sample data. Bikin Aset adds a few sample assets for your kind of business in your own categories and locations, one asset held by you, maintenance schedules (one overdue, one this week), a service record, a damage report and a document that expires soon, so Home fills up right away.
Everything is marked Sample and can be removed in one tap with Remove sample data in Quick start or Settings › Account › Getting started, without touching real data. Sample data counts towards your plan like regular data.
Next steps
- Recording assets to start filling your asset list.
- Locations & categories to tidy up places and asset codes.
- Roles & access to invite your team.
Last updated: