Bikin CRMGet started
Getting started with Bikin CRM
Sign up or sign in to Bikin CRM, set the currency, invite your team, then finish the Quick start checklist up to your first contact, deal and follow-up.
This page takes you from signing up to your first follow-up. Most steps only need to be done once, by the owner.
Sign up
- Open crm.bikin.studio/register, or choose Create one free on the sign-in page.
- Fill in Your name, Business or team name, Email and Password (at least 8 characters), then choose Create account.
- Enter the 6-digit code sent to your email.
You can also choose Sign up with Google. Because Google has already verified your email, you only fill in your name and business name, then choose Create account.
If the sign-up button doesn't appear, sign-up is closed for now. Contact BIKIN at contact@bikin.studio to get an account.
The person who signs up becomes the workspace Owner. New workspaces start on the free plan.
Signing in
- Enter your email and password, then choose Sign in.
- Enter the code from your email. It's valid for 10 minutes.
After that you stay signed in on that device for 30 days. Choose Sign in with Google if your Google account uses the same email. If Settings › Account has a Google account card, you can also link a different Google account with Link Google account. Forgot your password? Choose Forgot password? on the sign-in page.
Sign in with WhatsApp
If the Sign in with WhatsApp button is on the sign-in page, you can sign in with a code sent by WhatsApp:
- Add your WhatsApp number once in Settings › Account, on the WhatsApp number card: enter the number, choose Send code, enter the Code from WhatsApp, then choose Verify. Because this changes how you sign in, Bikin CRM asks for an email code first.
- On the sign-in page, choose Sign in with WhatsApp and enter that number.
- Enter the 6-digit code from WhatsApp.
Sign-in codes come from BIKIN's WhatsApp number, not your business number. A verified number is also used for task reminders by WhatsApp; see Agenda & follow-up.
Currency
Deal values, the catalogue, targets, quotes and invoices in your workspace use one currency, set in the Currency card at the top of Settings › Data. Thousand and decimal separators follow that currency, such as Rp 1.250.000 for Indonesian rupiah and RM 1,250.50 for Malaysian ringgit, and amount fields add the thousand separators as you type. A new workspace gets the currency of the country it signs up from.
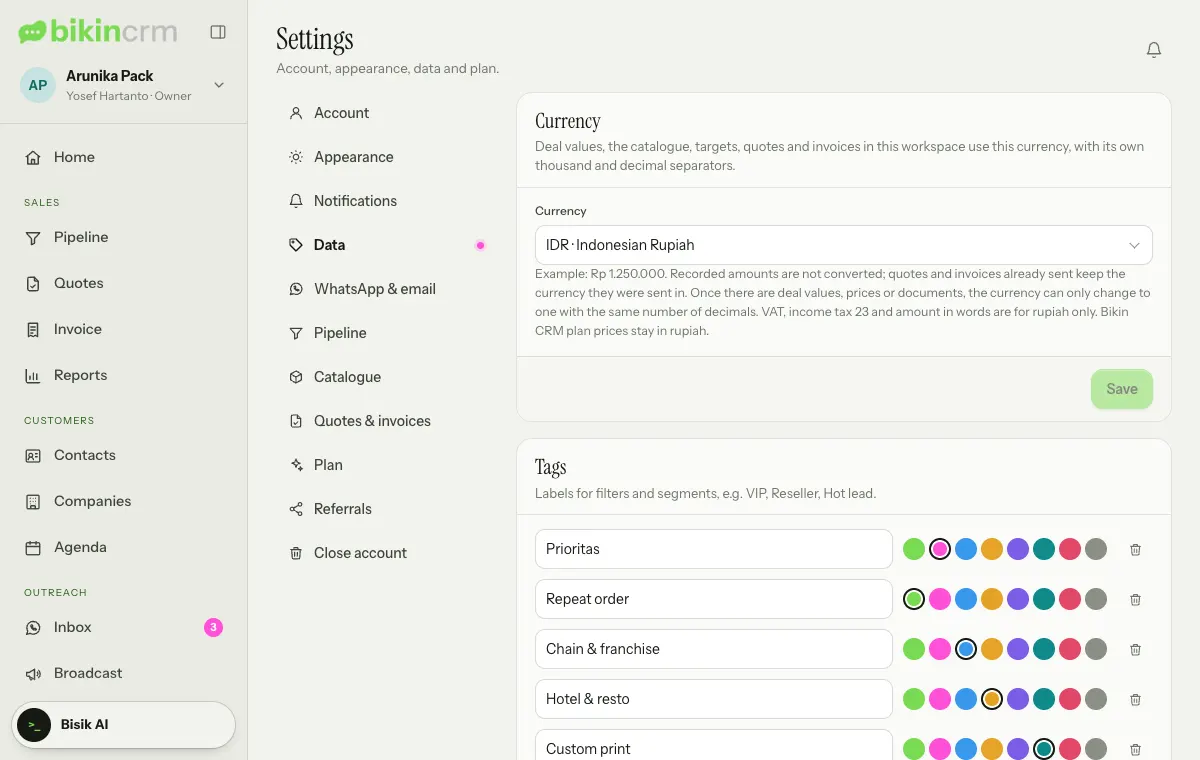
- Only the owner changes it: pick a currency in the list (type in the search box to find it), then Save. Managers see the card with Only the owner changes it.
- Until there are deal values, prices, targets or documents, you can change the currency freely. After that it can only change to a currency with the same number of decimals, because recorded amounts are never converted. Quotes and invoices already sent keep the currency they were sent in.
- VAT (PPN), PPh 23 and the amount in words are only for businesses that use Indonesian rupiah (IDR). With another currency those options are locked, marked Only for businesses that use Indonesian rupiah (IDR).
- Bikin CRM plan prices, bills, coupons and referral commission stay in rupiah.
Inviting your team
The owner and managers invite teammates from Users & teams (left sidebar, Admin group):
- On the Users tab, choose Invite at the top right.
- Fill in Name, Email and Role, plus Team if you have teams.
- Leave Email an invitation on, then choose Invite in the dialog. Your teammate receives an email with a temporary password.
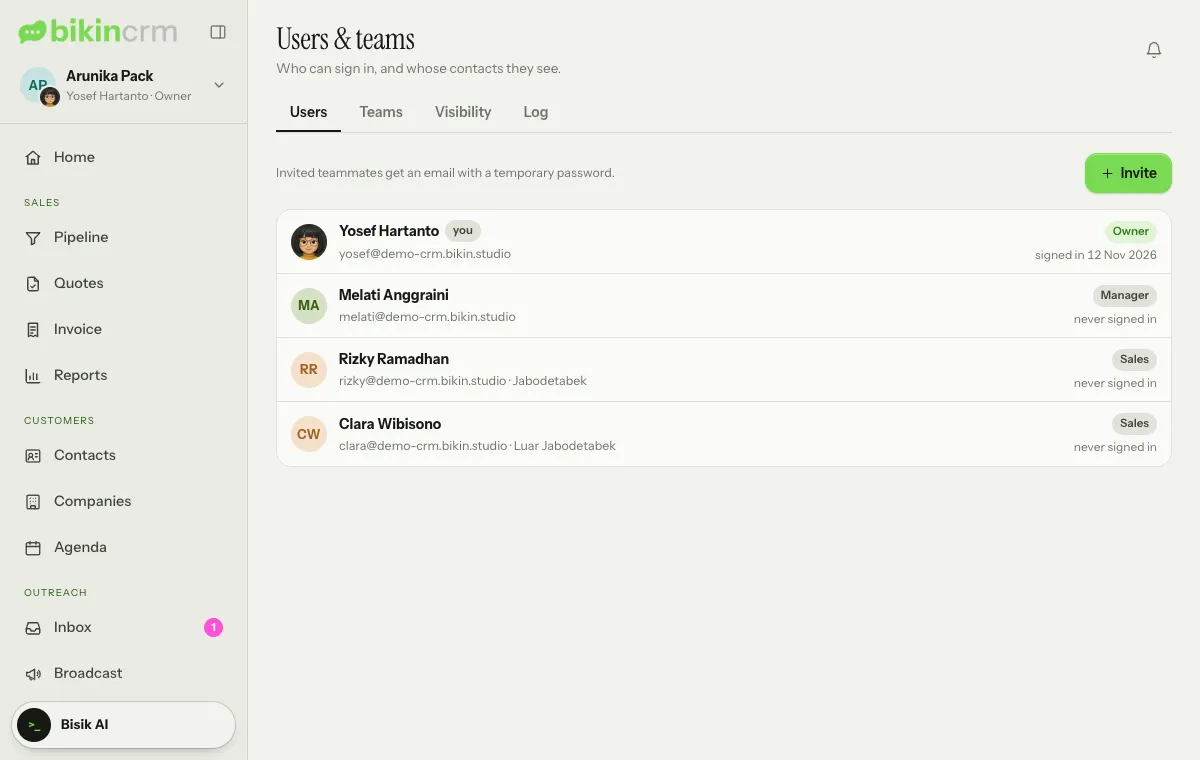
- They sign in with that email and temporary password, enter the code from their email, then change the password in Settings › Account.
If you turn the email switch off, type a Temporary password yourself and give it to your teammate. Choose roles carefully; see Roles & access. The number of users follows your plan.
Profile photo
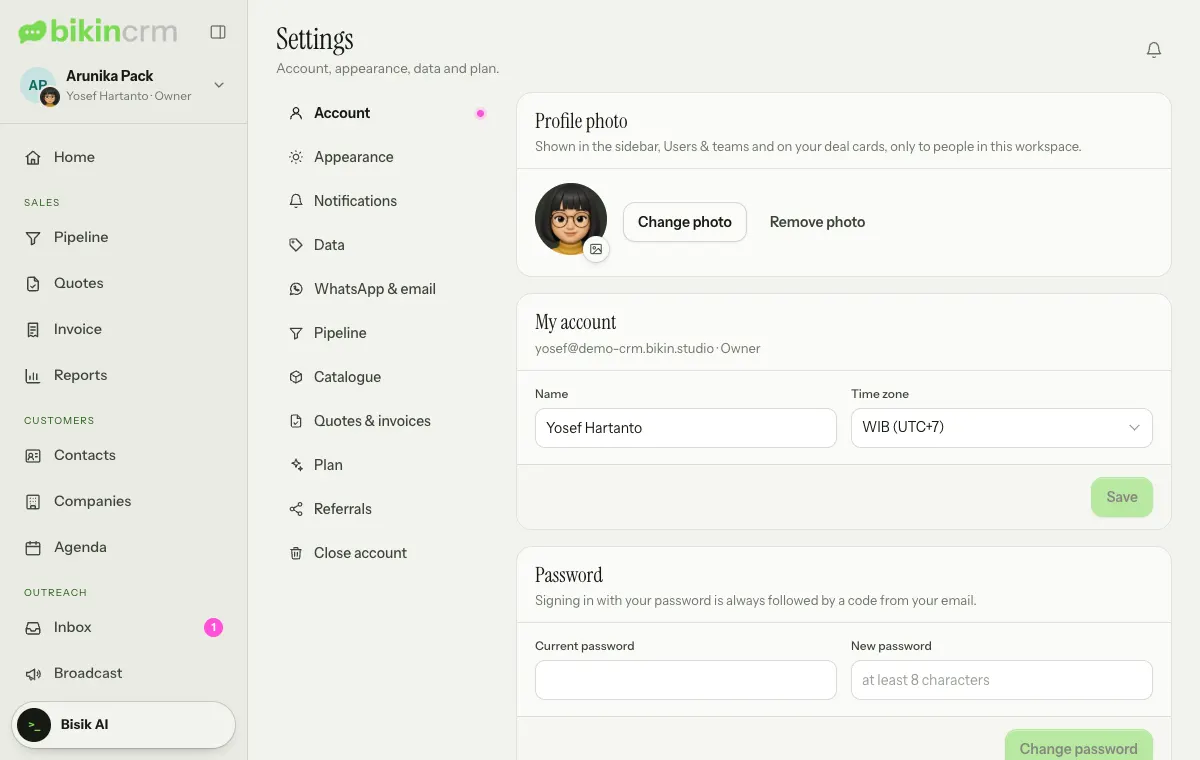
The Profile photo card in Settings › Account shows your photo as a small badge on the business avatar at the top of the sidebar, in Users & teams, and on your own deal cards in Pipeline. Choose Upload photo (or drag an image onto the card), then a JPG, PNG or WebP image; in Adjust your photo, drag the photo and use the slider to zoom, then choose Save photo. It's cropped square and shrunk on your device before upload. Change photo uses another image, and Remove photo goes back to your initials. Only people in this workspace see your photo, it never appears on quotations, invoices or public links, and it's deleted when you're switched off or your account is deleted. The logo on quotations and invoices is set separately in Settings › Quotes & invoices, card Letterhead.
Welcome and Quick start
When you first sign in, Bikin CRM shows a few welcome cards for your role; choose Next to read them or Skip. The owner and managers also get a Quick start card at the foot of the left sidebar, just above Bisik AI (in the sidebar drawer on a phone). It shows your progress in percent and the next step; tap it to open the list of steps.
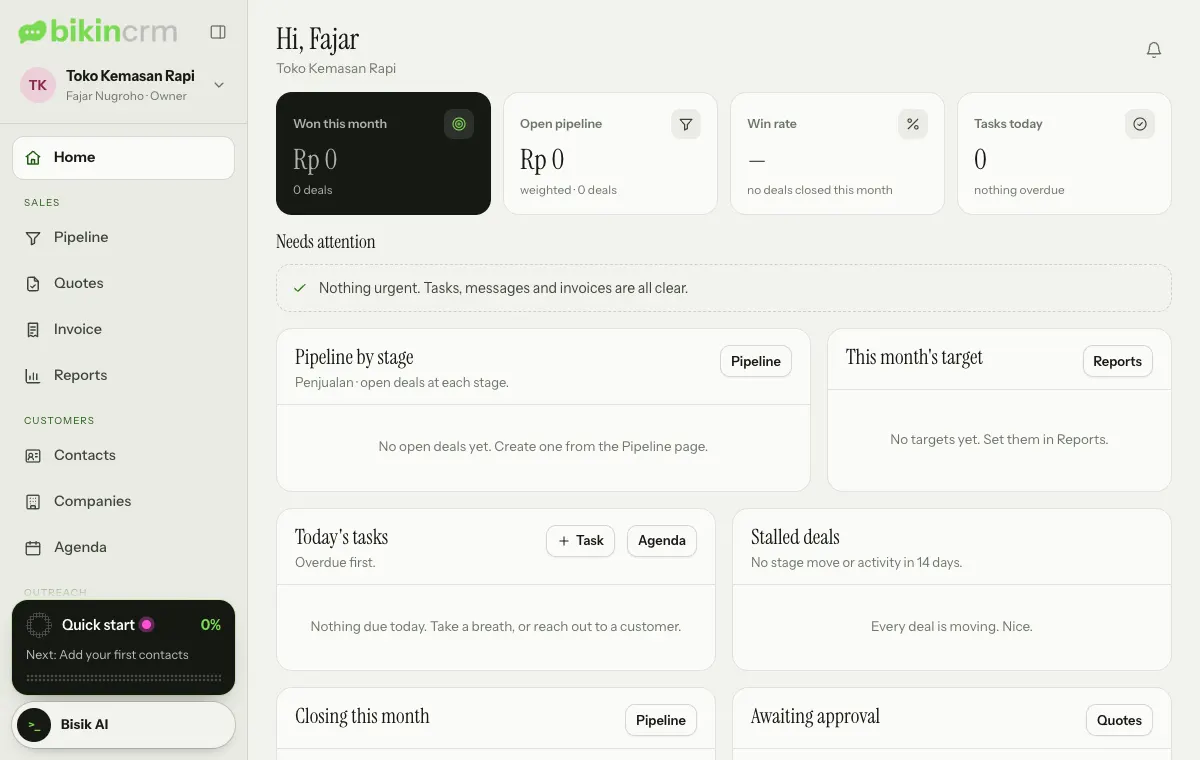
The required steps:
- Add your first contacts.
- Add a customer company, for B2B customers.
- Log your first activity: a note, call or WhatsApp.
- Create your first deal in the pipeline.
- Add a follow-up task.
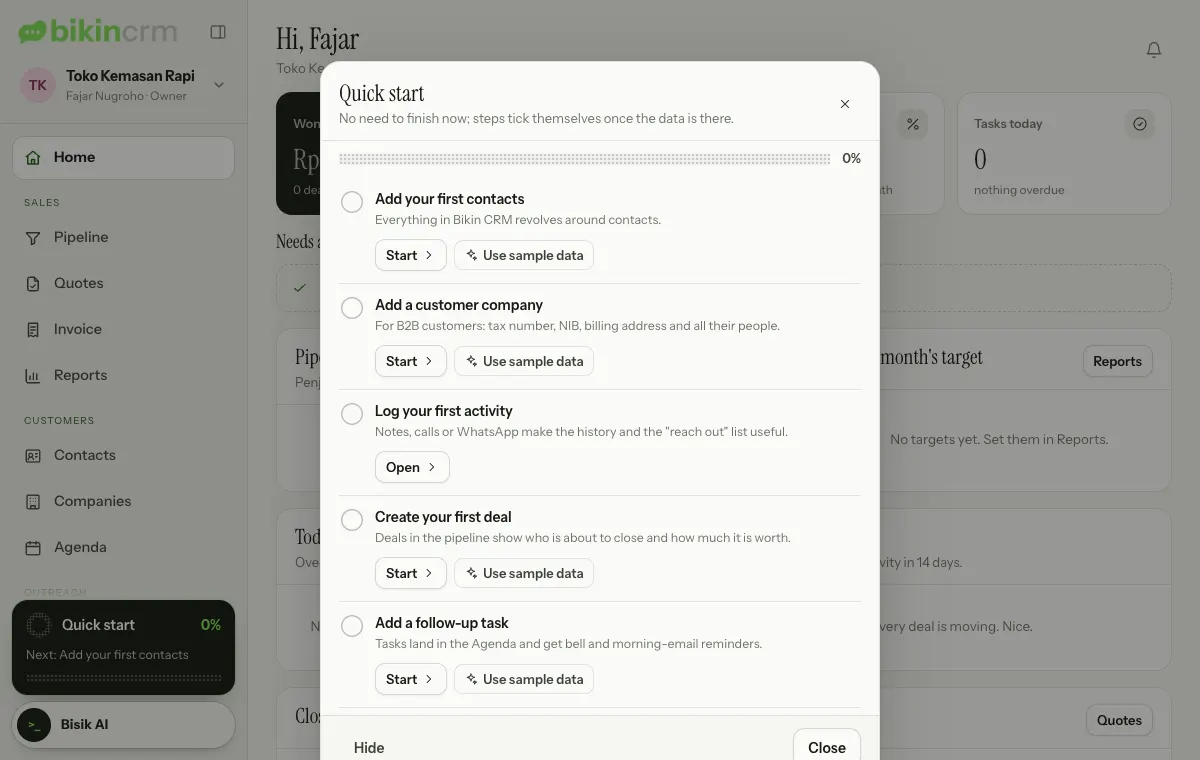
Steps marked can wait can follow later: Send your first quote, Connect WhatsApp, Import existing contacts, Create tags and Invite teammates. Each step explains why it matters and has a button (such as Add or Create) that takes you to the right page. Steps tick themselves off once the data is there. Steps outside your plan or role don't appear. Once the required steps are done, press Finish.
Sample data
Want to see Bikin CRM filled in first? In the Quick start list, choose Use sample data, then Add sample data. The sample contacts, companies, deals, tasks and the rest are marked Sample. Sample data counts towards your plan like regular data, and can be removed in one tap with Remove sample data without touching real data.
Quick start can be hidden with Hide and opened again from Settings › Account › Getting started with Show Quick start. On the same card, Replay the guide shows the welcome and page tips again.
Notifications
In Settings › Notifications you choose how you hear about things. The bell at the top right of the app is always on; email and push to your devices can be turned on or off per event.
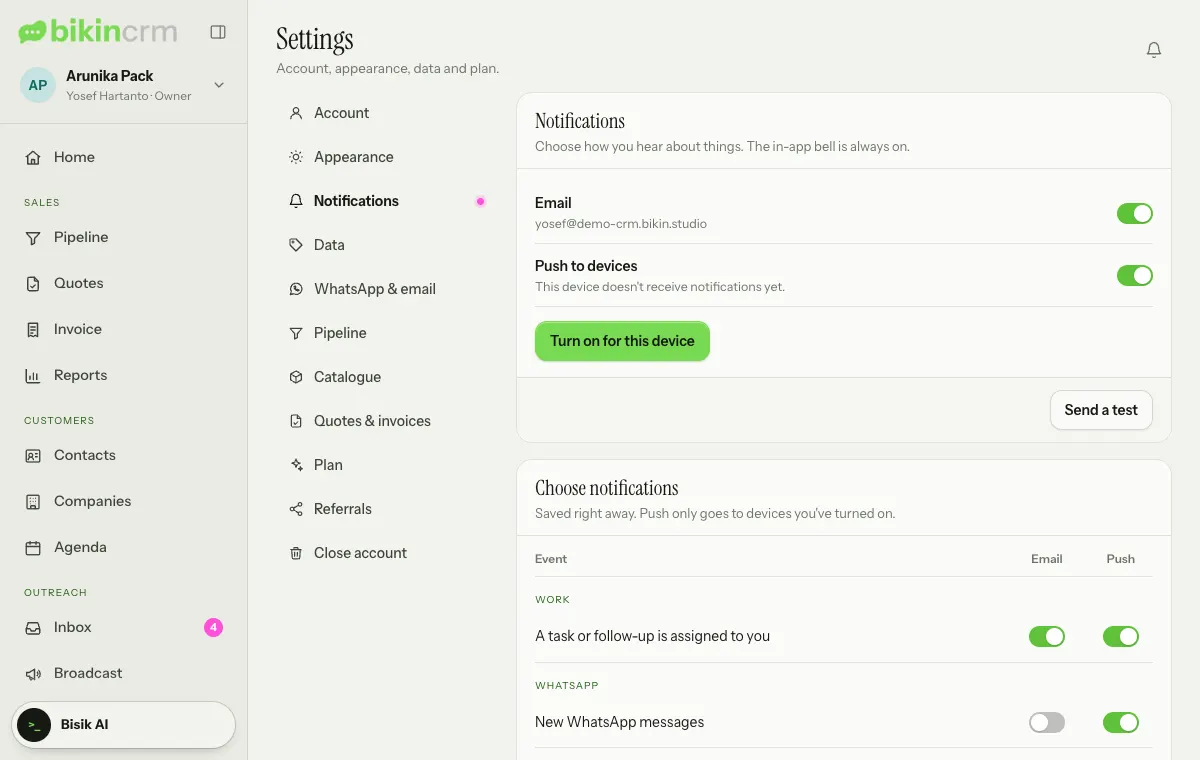
- Email goes to your account address. By default it's on for important events (tasks, quotes and invoices, due dates and the morning summary), and off for the rest.
- Push to devices: tap Turn on for this device and allow it in your browser. Do it on every phone or computer that should get notifications; Turn off on this device stops it. On iPhone, push only works once the app is on your home screen (Share › Add to Home Screen).
- Send a test sends one test notification to your active devices and your email, so you know everything arrives.
- Demo accounts don't send emails or push notifications.
Next steps
- Contacts & companies to add and import contacts.
- Pipeline & deals to start tracking opportunities.
- Roles & access before inviting your team.
Last updated: